# Viewer
This is where you can view all the medias that have been submitted so far at different steps for any assets or episodic shots.
Beside from viewing shots, you can also view and add comments along with medias to shots and approve, invalidate or send those shots in retake.

You first start by selecting your episode with the select episode pulldown menu.
The steps you selected in the select visible steps section of the settings page
will be displayed. If you do not see a step although it is checked in the settings page, it is either because you do not
have the rights to see this step for that episode or because this step is not active.
- Check the administration page > rights to ensure you have the proper rights.
- Check the administration page > steps to ensure that step is active.
- If you do not have access to the administration page, check with your studio director or line producer.
When you click on a step, it will display all the assets and episodic shots which go through this step according to their workflow. Asset and episodic shot names are colored according to their status at the selected step. The following naming conventions are used:
- If slash / appears at the end of the name, it means that several medias are available for this element
- If a name is followed by .m, it means this it is a master element
- If a name is followed by .re, it means this it is a reuse of another element
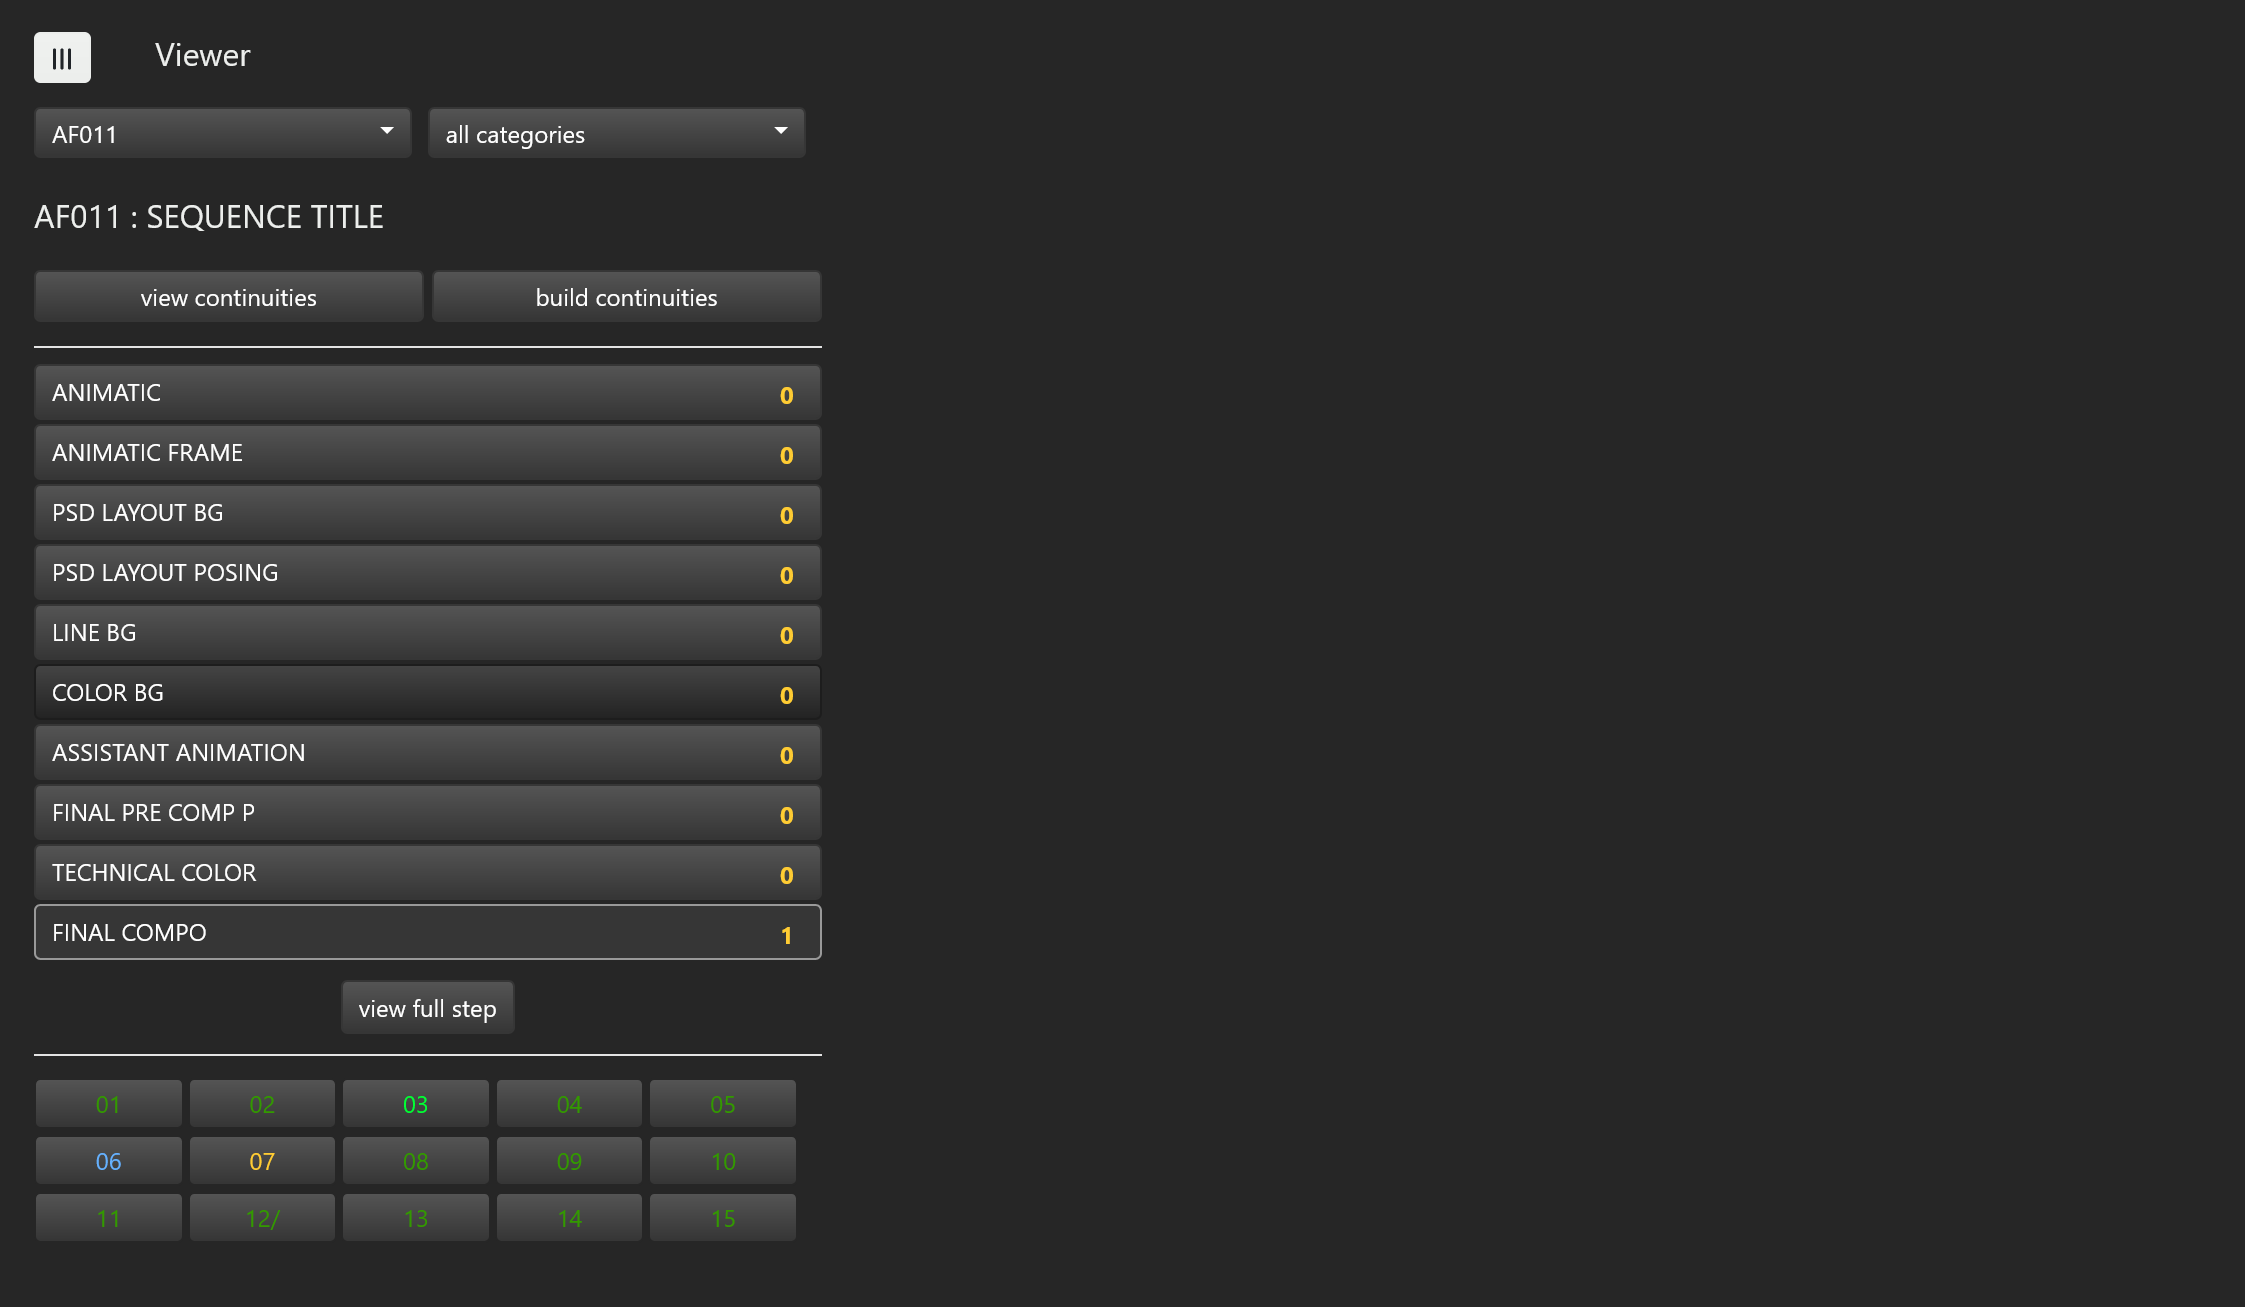
In the following example, after we selected AF011 and step FINAL COMPO, the list of episodic shots from AF011 going through the FINAL COMPO step as per their respective workflows is displayed.
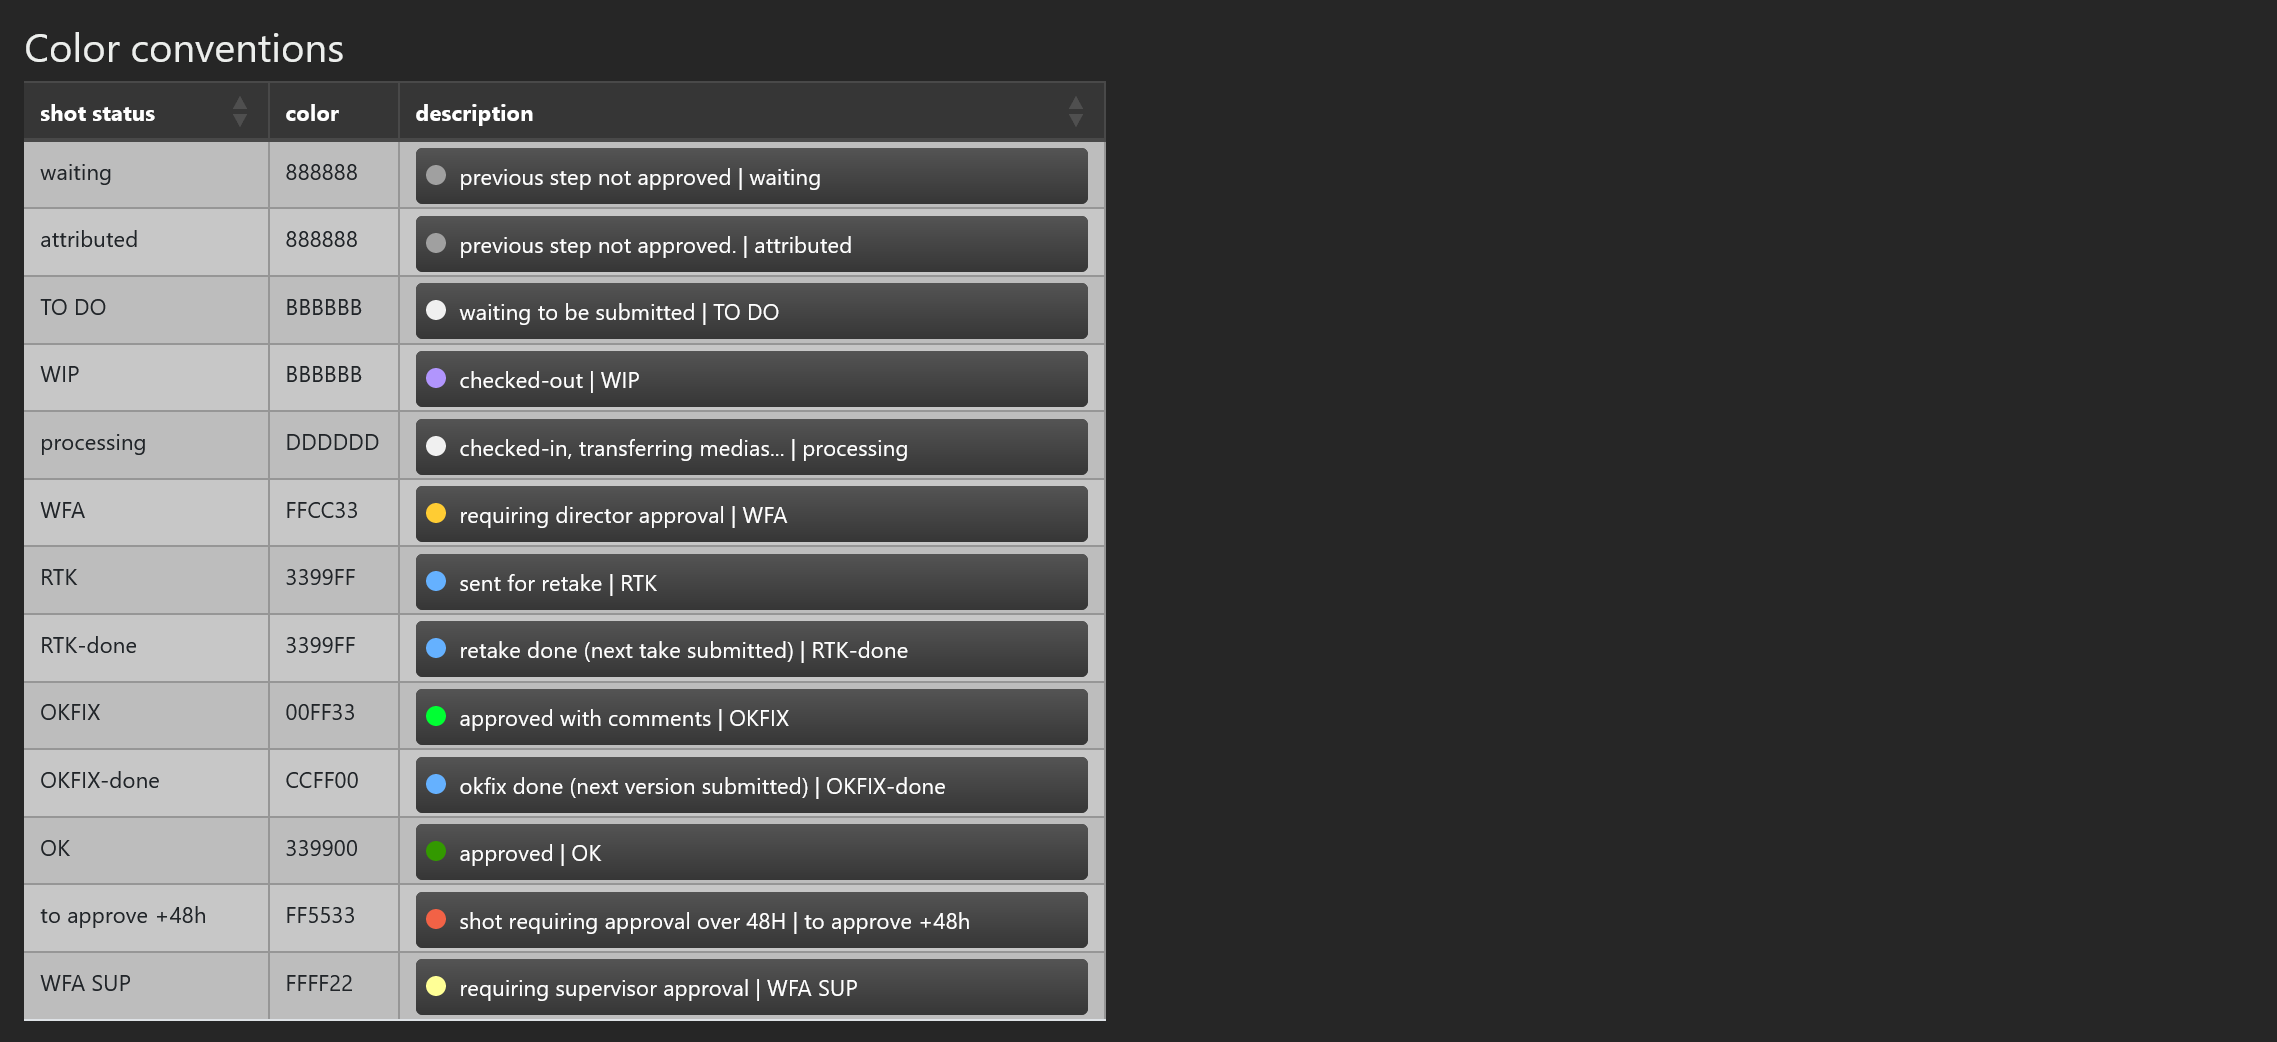
Note this the shot colors follow the shot status color convention below which also defined in the settings page.
The View continuities and the build continuities buttons will be explained later in this chapter under the
continuity player section.
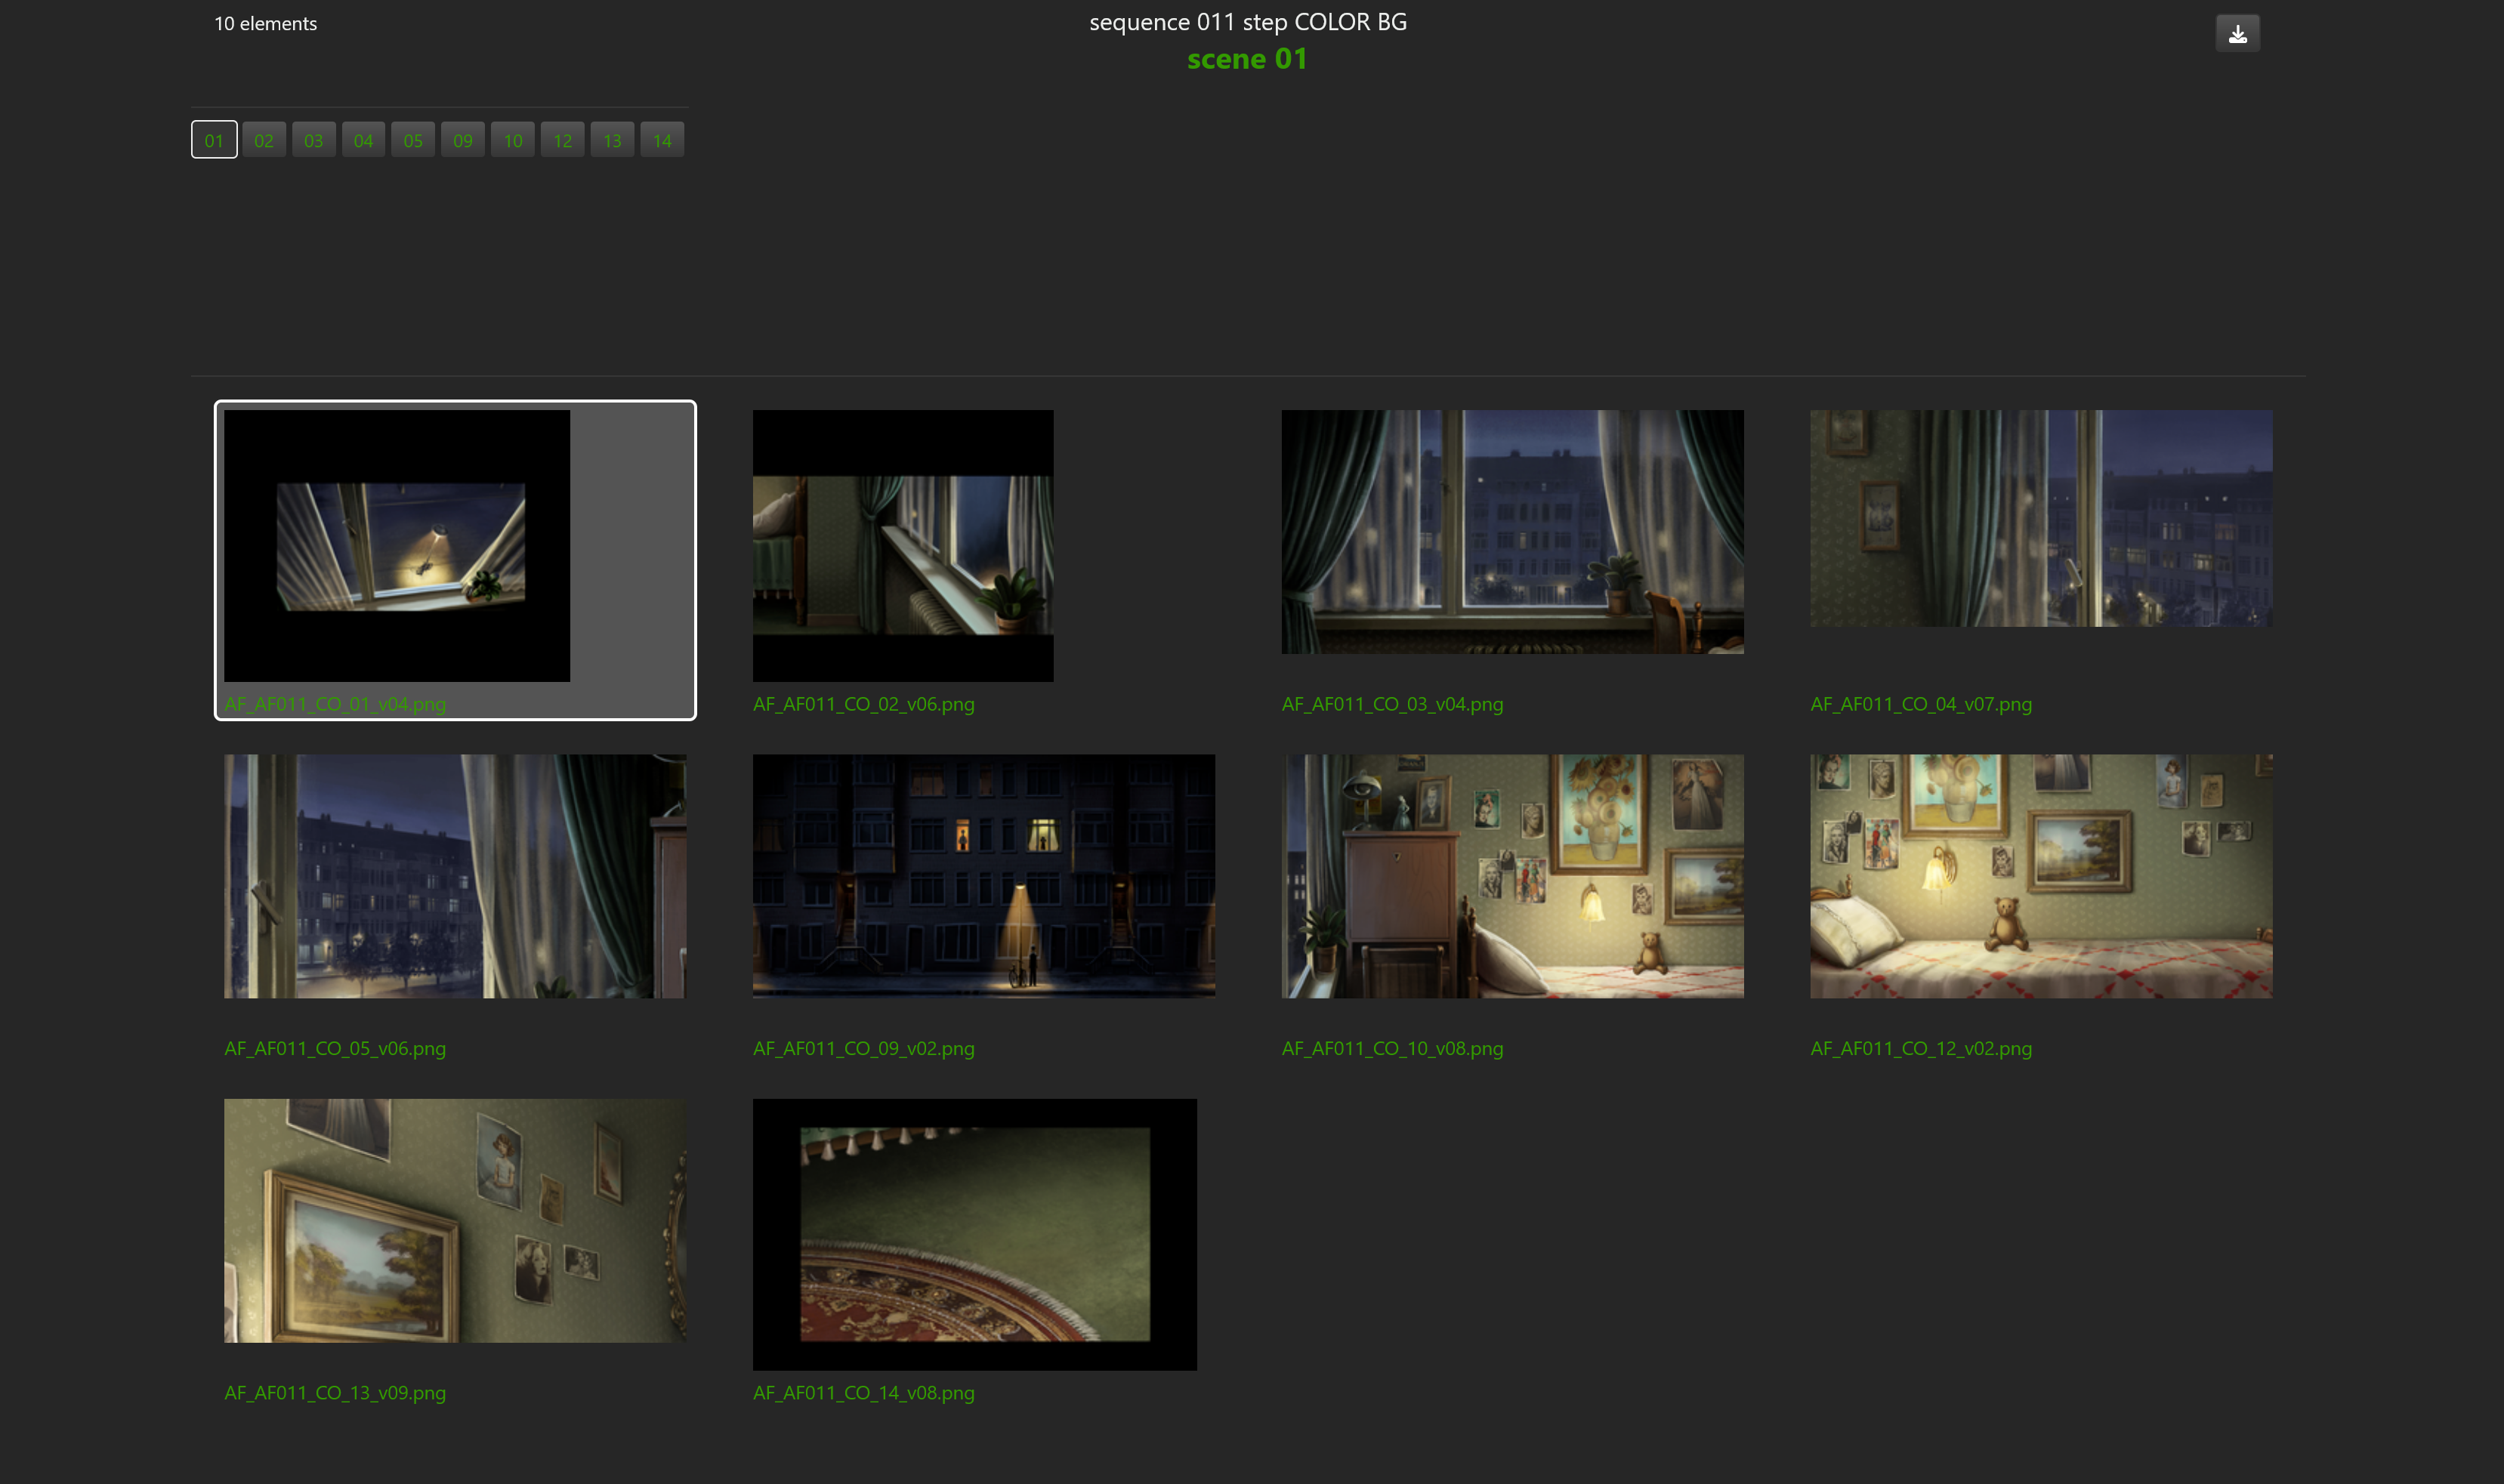
The view full step button will display all the visuals available for all the assets and episodic shots going through this step
in a separate tab of your browser.
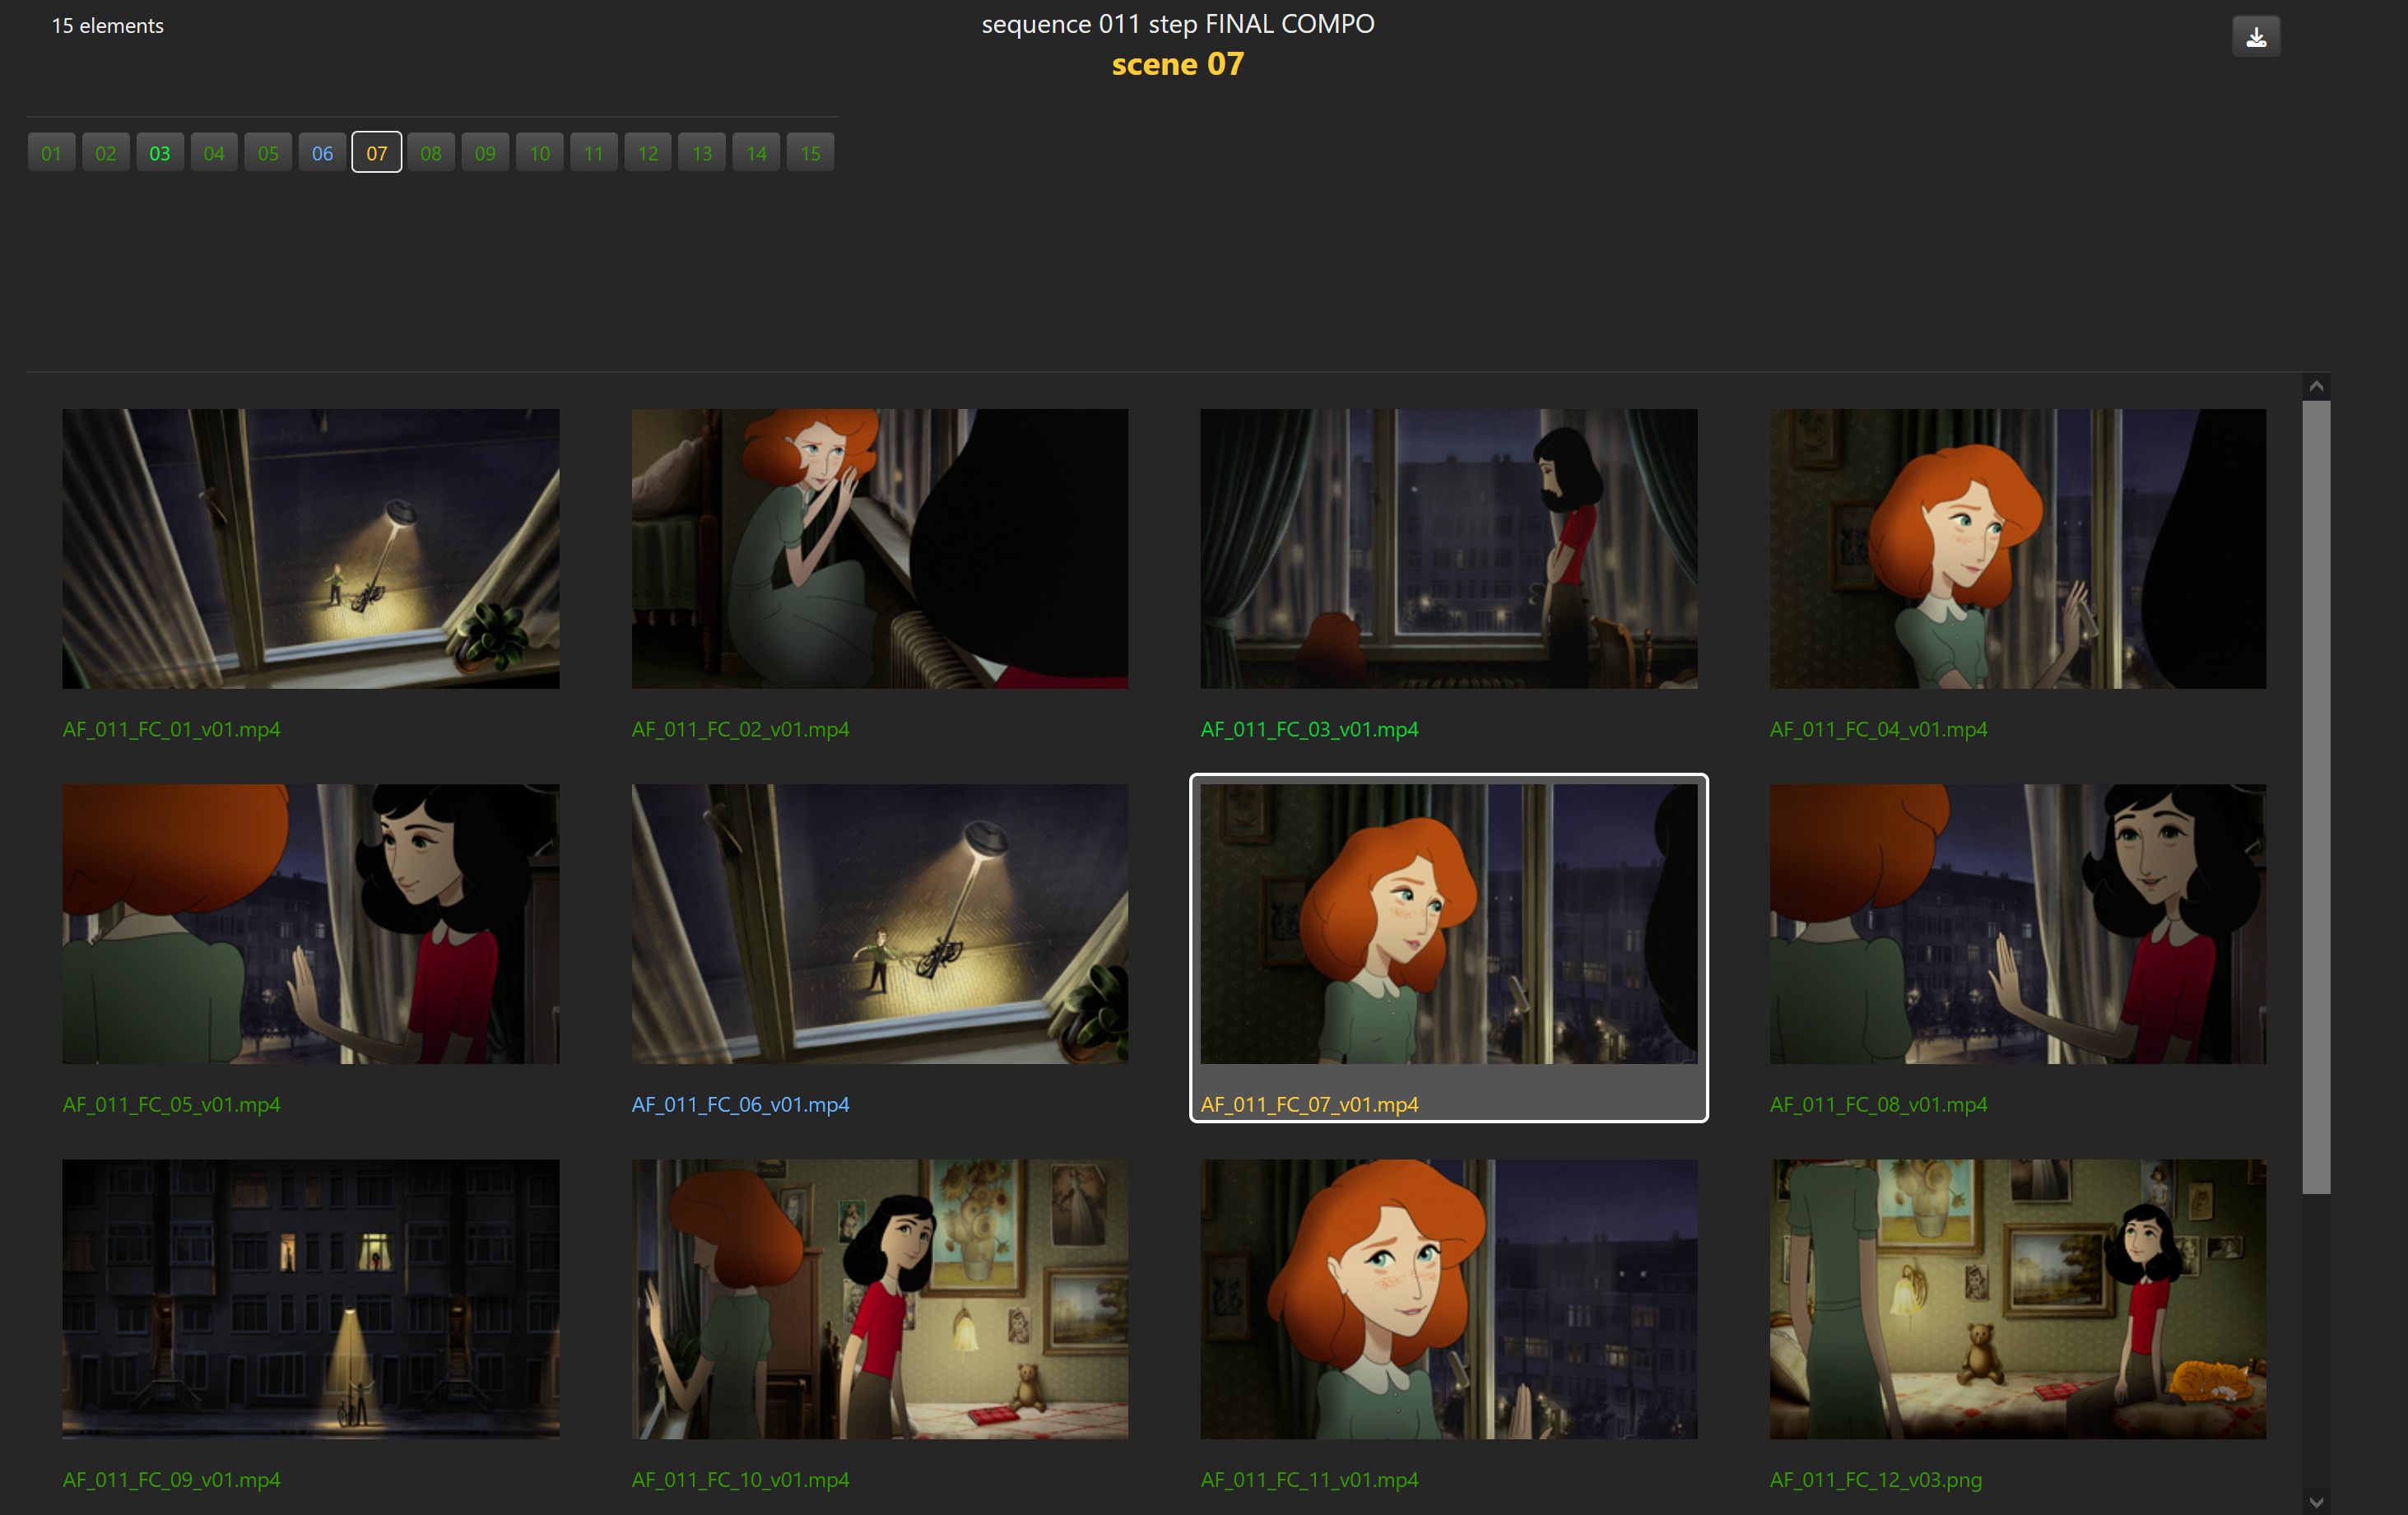
TIP
The view full step display can be very useful to assess the continuity of color backgrounds in an episode or a sequence.
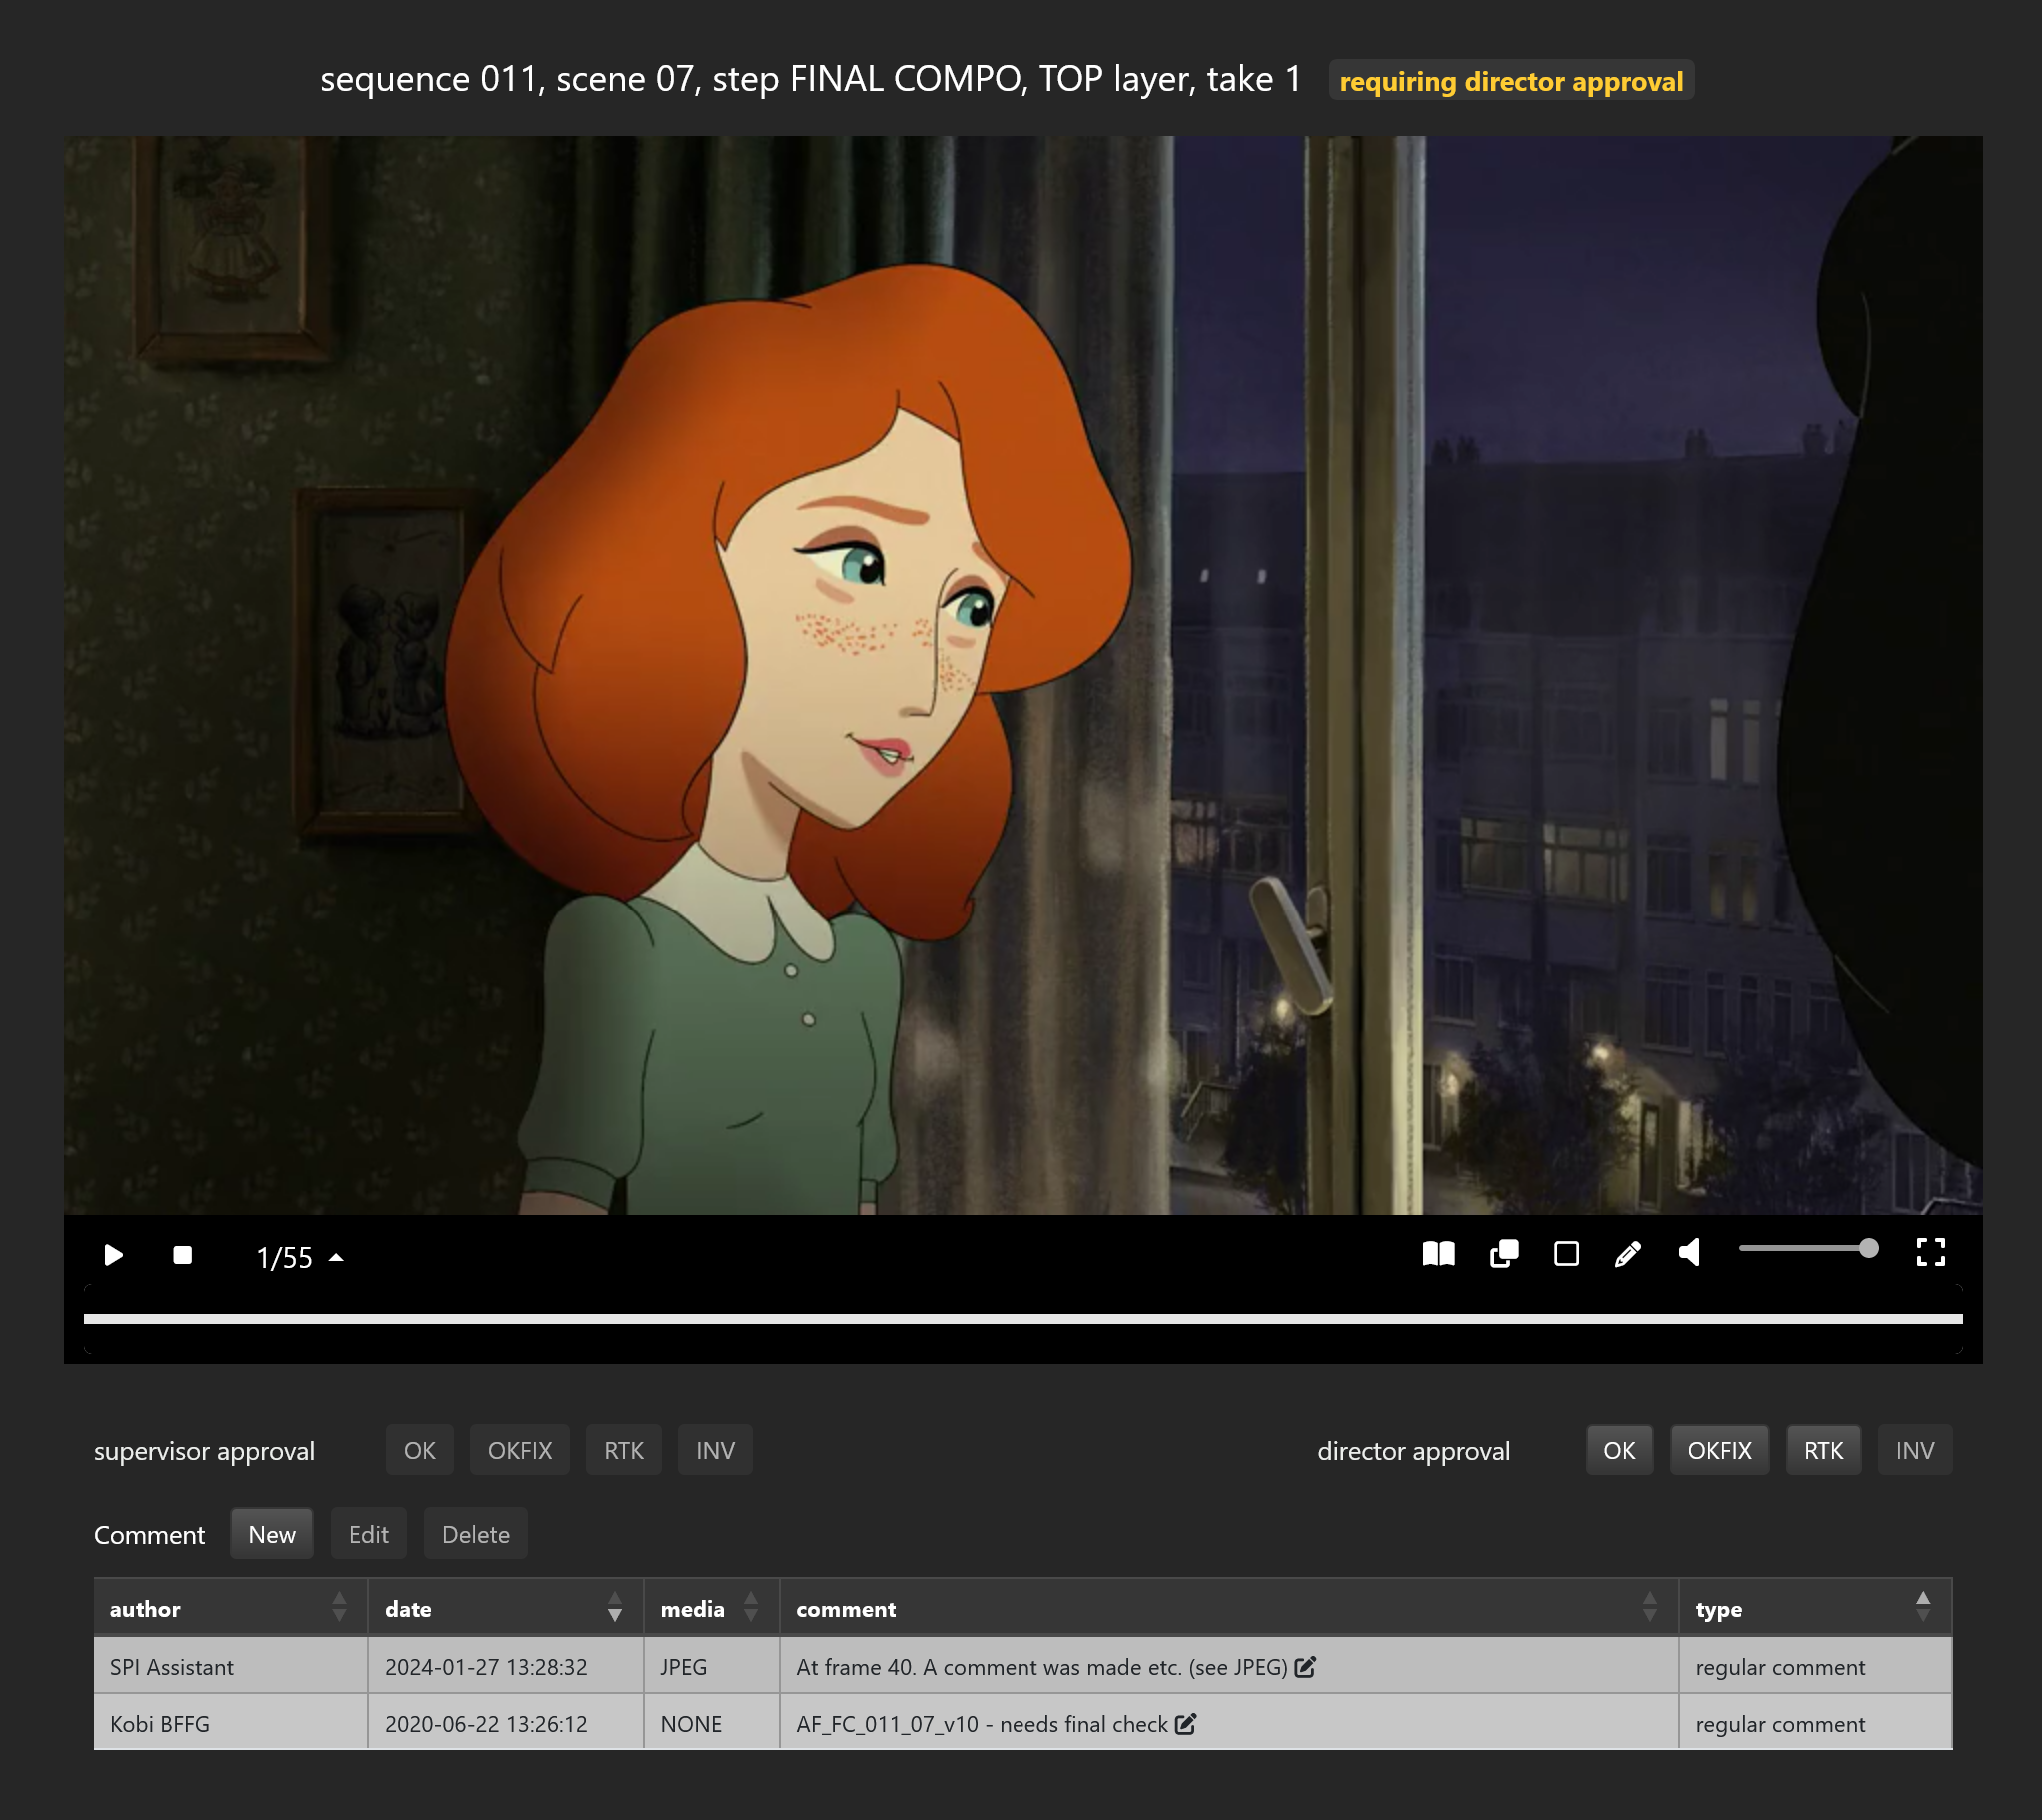
When you click on an episodic shot or an asset, the right part of the viewer page called the shot view is refreshed with the latest take of the element at the selected step.
In our example, if we click on scene 07

the shot view will display FINAL COMPO take 1 for episodic shot name 07.
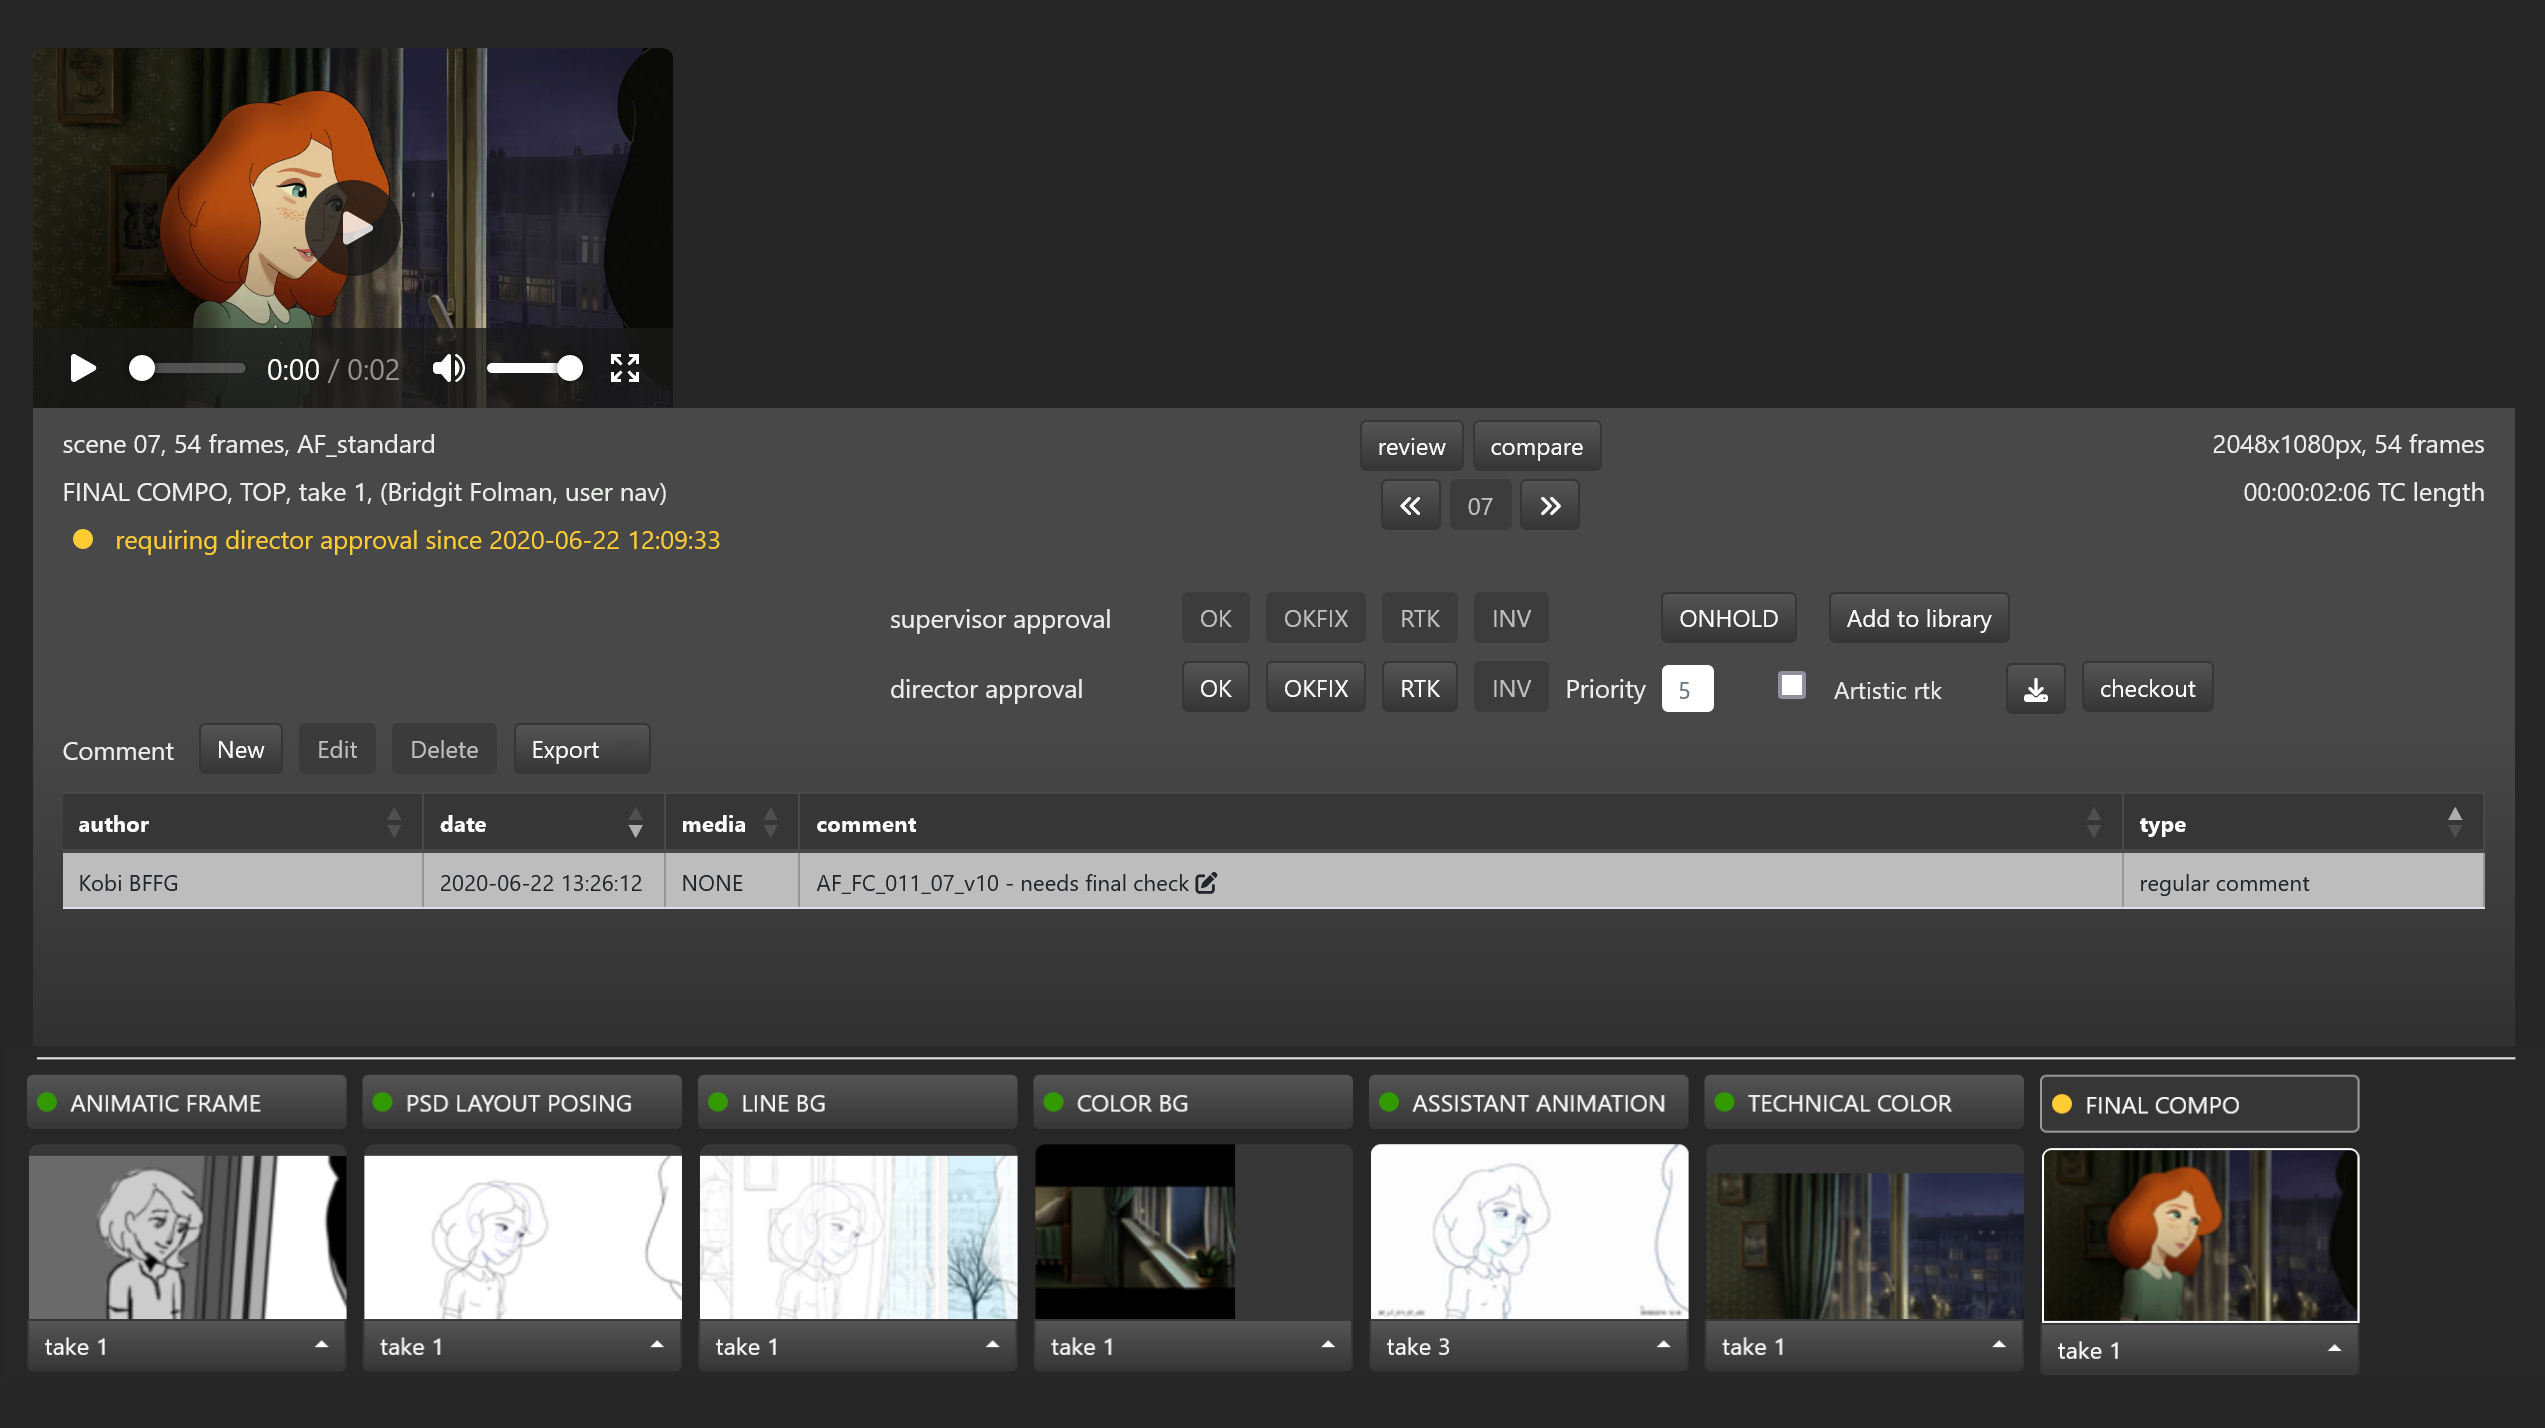
The supervisor and director panels allows you to eventually change the status of the shot:
- the
OKbutton will approve the shot - the
OKFIXbutton will approve the shot along with a comment - the
RTKbutton will send the shot in retake - the
INVbutton will invalidate an approval or a retake and set the status to Waiting For Approval
The checkout button allows you to download the original element that was uploaded for this shot.
You can review the element by clicking on the review button.
Depending on the media that was uploaded for this shot, a media player will be launched in a separate window:
- The video player for videos,
- The image player for images,
- The slideshow player for multiple elements.
In the shot view, all the comments pertaining to this shot will also be displayed. You can click on the New button to add a comment.
The full history of the shot is displayed at the bottom line of the shot view: it consists of all the steps that the selected asset or episodic went through according to its workflow. Whenever present, medias are displayed for each step. If you click on a thumbnail, the shot viewer will be refreshed with this new shot information.
# The video player
The video player will be launched whenever you hit the review button on video medias. The video player allows you to:
- play and compare videos side by side or with the video over mode on
- annotate video at a specific frame
- add comments to the video
- approve or send the shot in retake or invalidate the shot

# Video comparison
With the video player, you can compare videos side by side with the  button.
When you do a comparison, the full history of the shot will be displayed and you will able to select among all the steps this element went through the one to compare against.
button.
When you do a comparison, the full history of the shot will be displayed and you will able to select among all the steps this element went through the one to compare against.
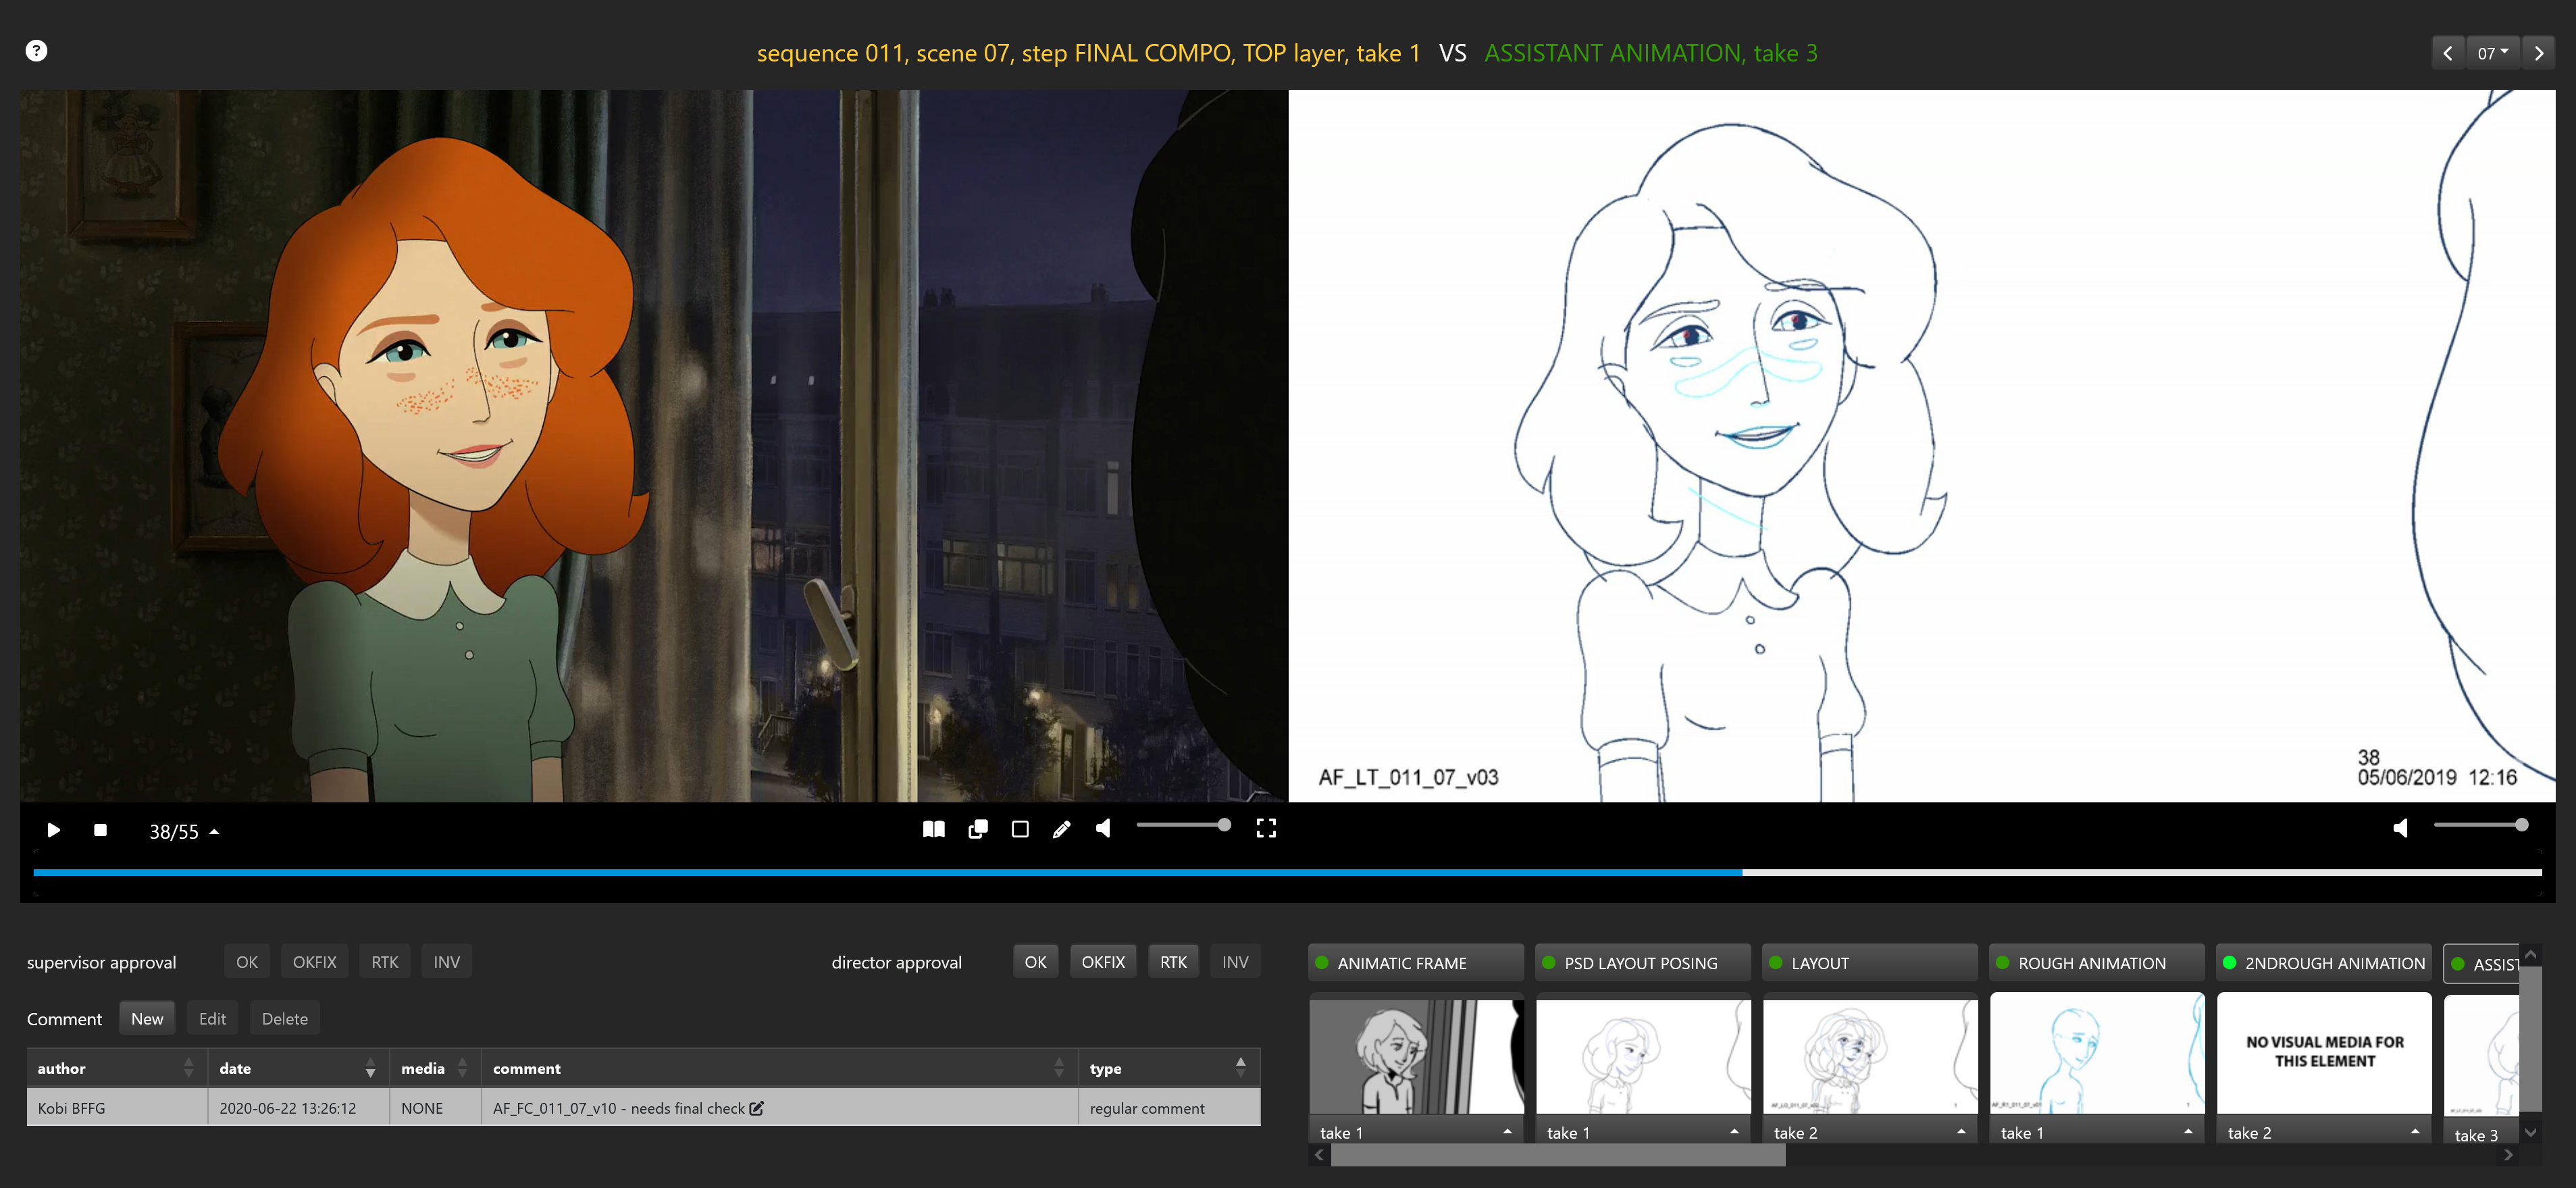
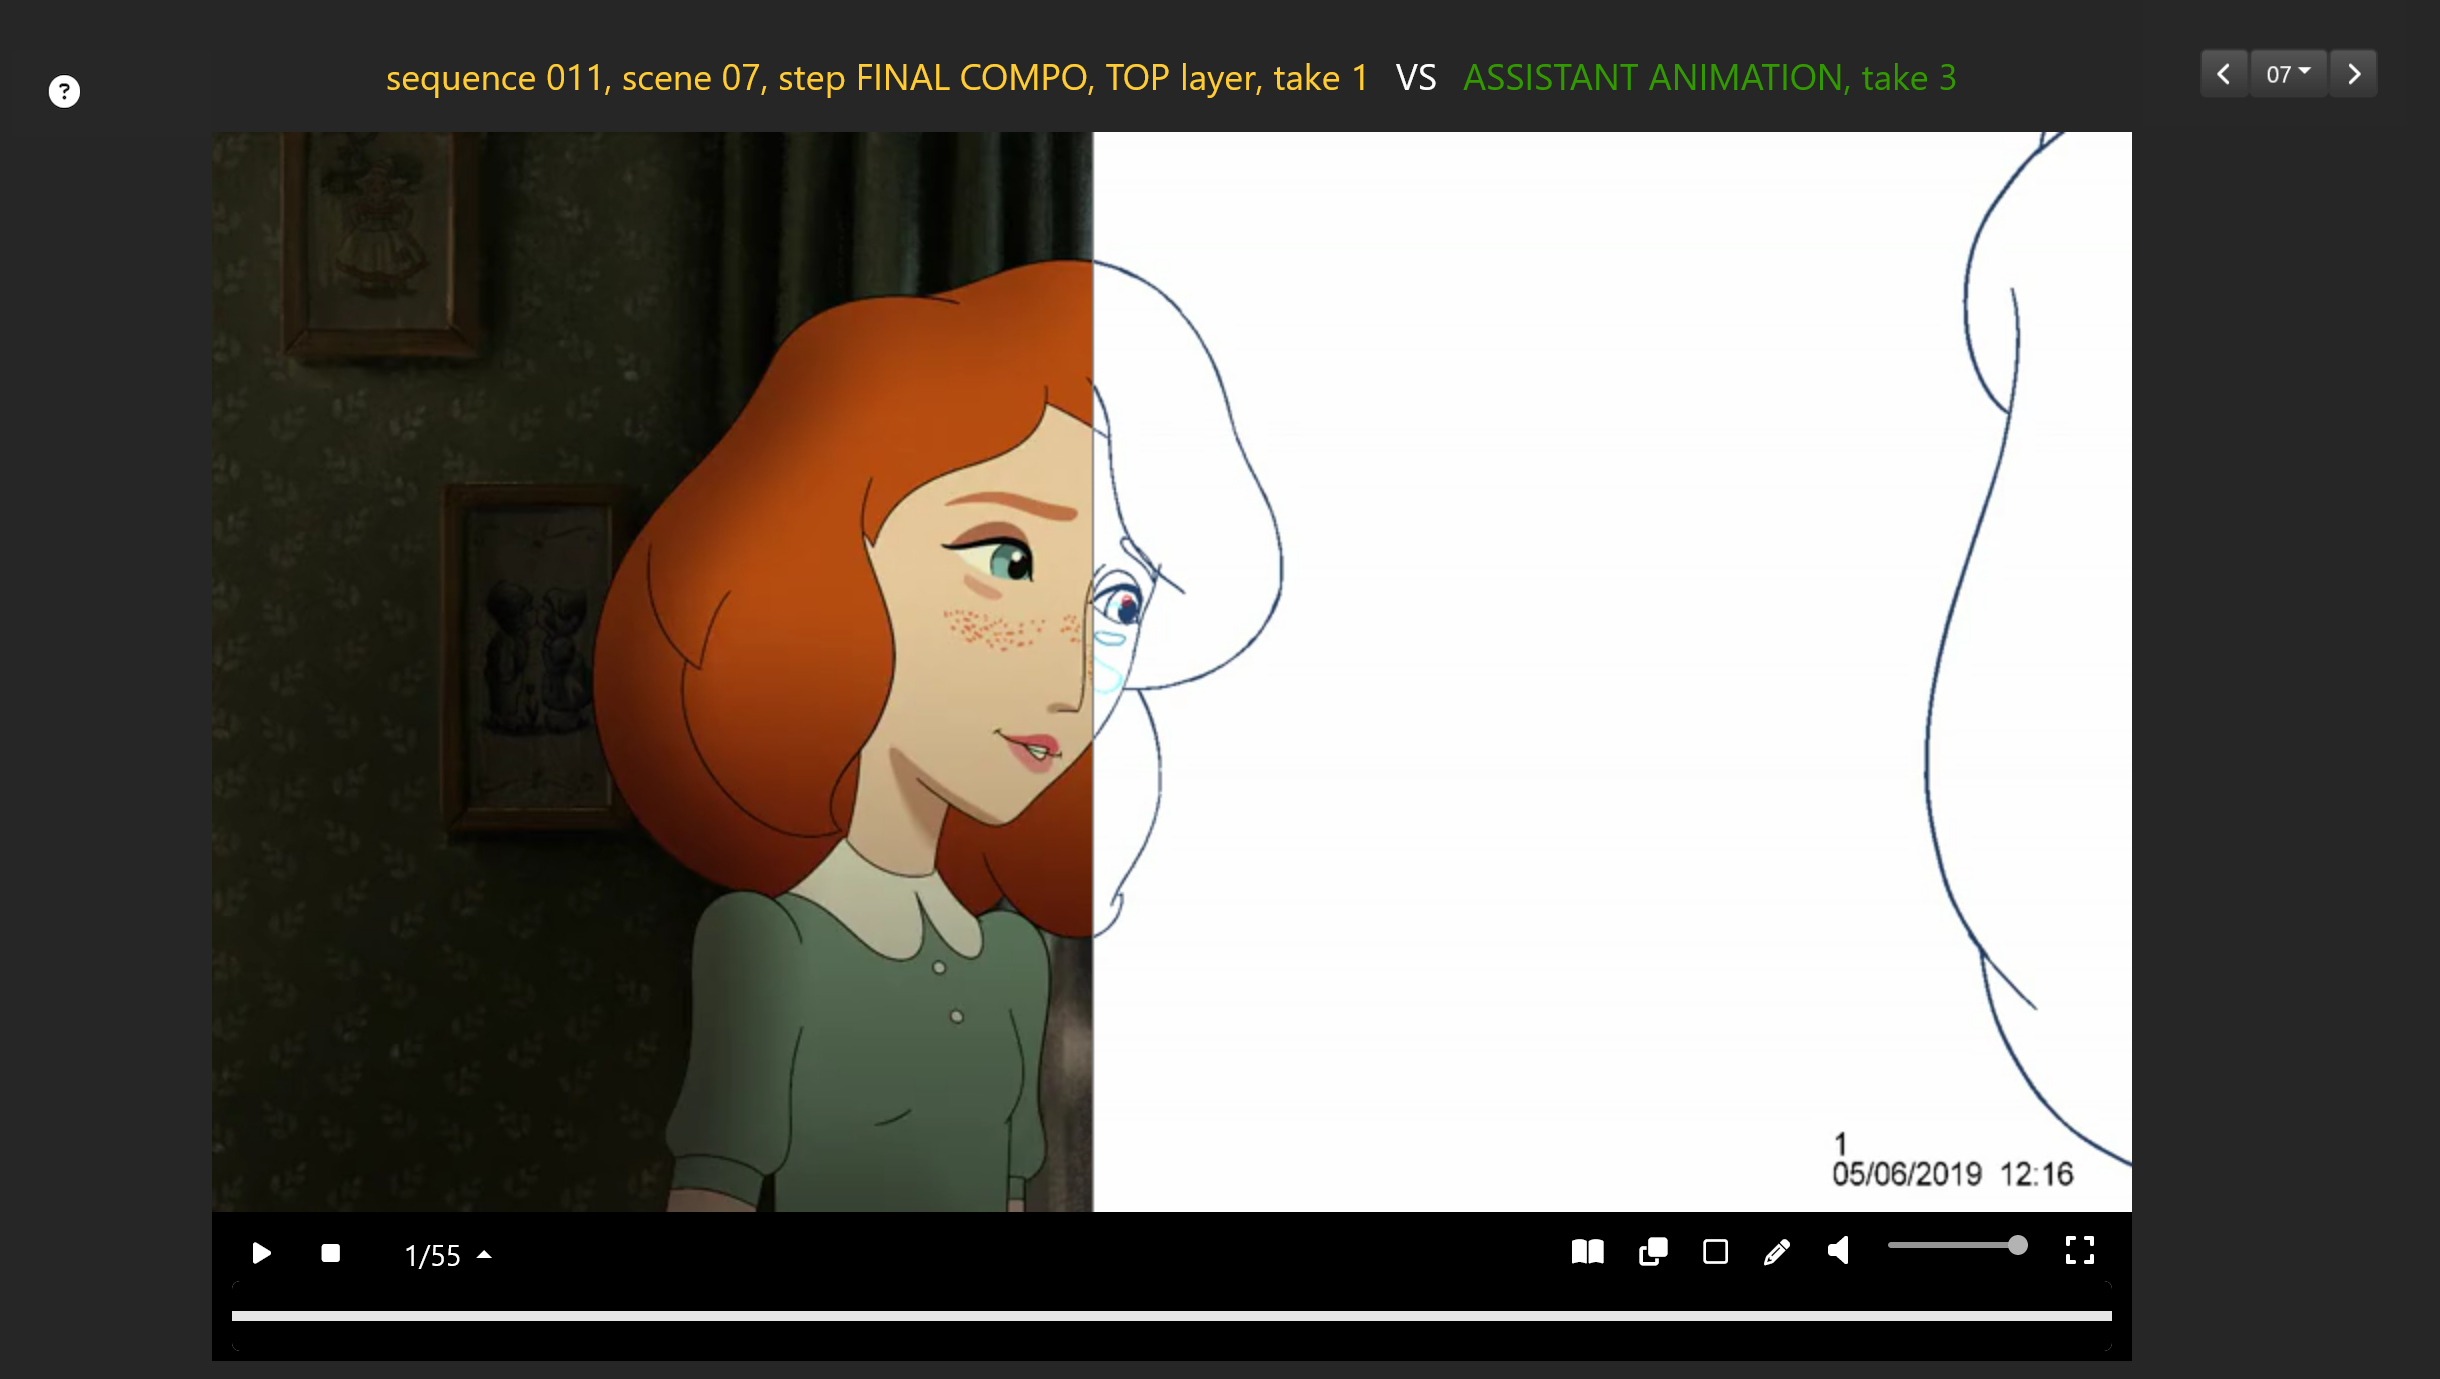
You can also compare videos in video over mode with the  button.
The screen will be splitted vertically, with the left part of the screen displaying the shot and the right part of the screen displaying the shot
to compare against. The mouse can then be used to click and drag the vertical separation between the two videos to compare:
button.
The screen will be splitted vertically, with the left part of the screen displaying the shot and the right part of the screen displaying the shot
to compare against. The mouse can then be used to click and drag the vertical separation between the two videos to compare:
# Annotating tool
When reviewing a video, you can play the video, stop at a given frame and launch the annotating tool with the
 button to draw on top of the selected frame.
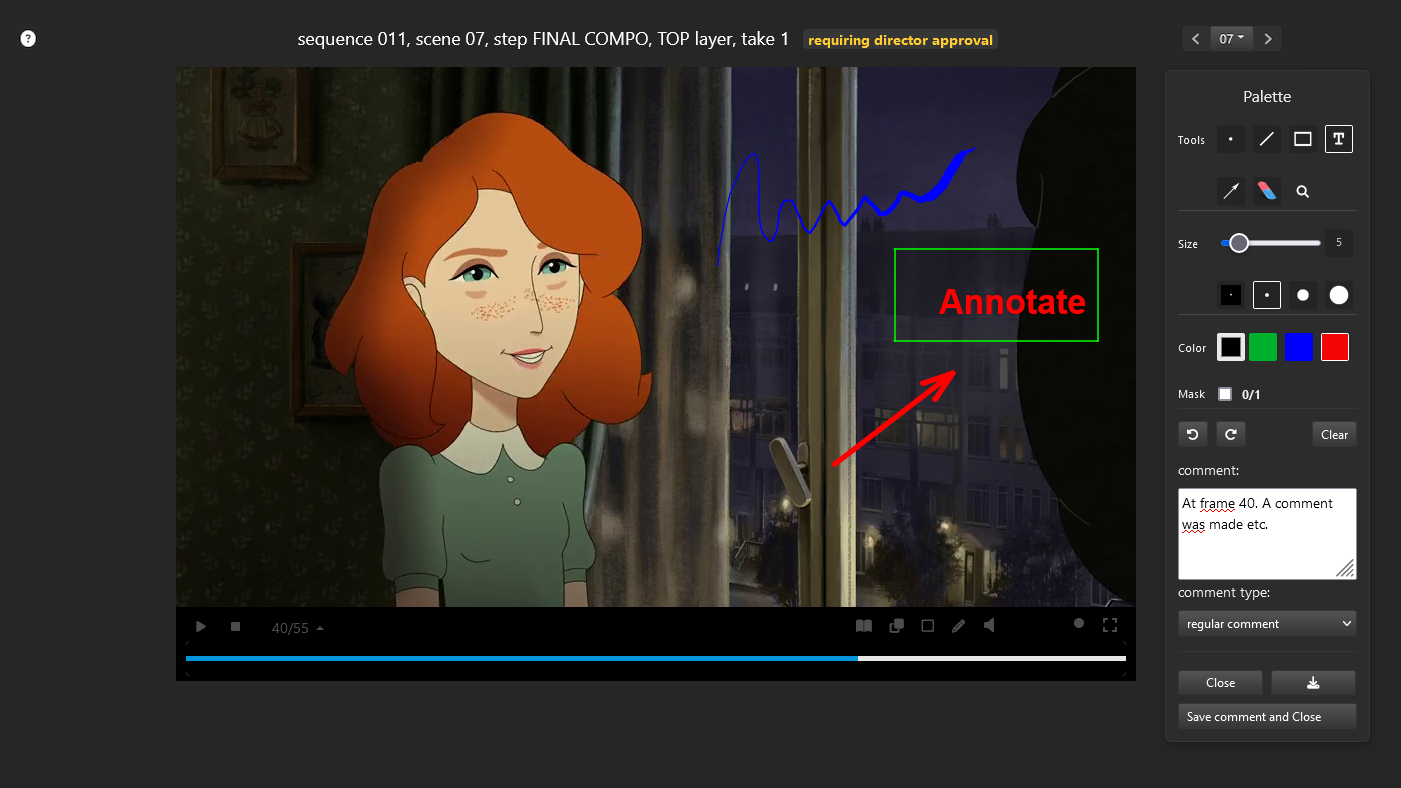
If you hit the Save comment and close button, your comment along with the drawing will be saved in the comment section. The Close button
is used to quit the annotating tool without saving.
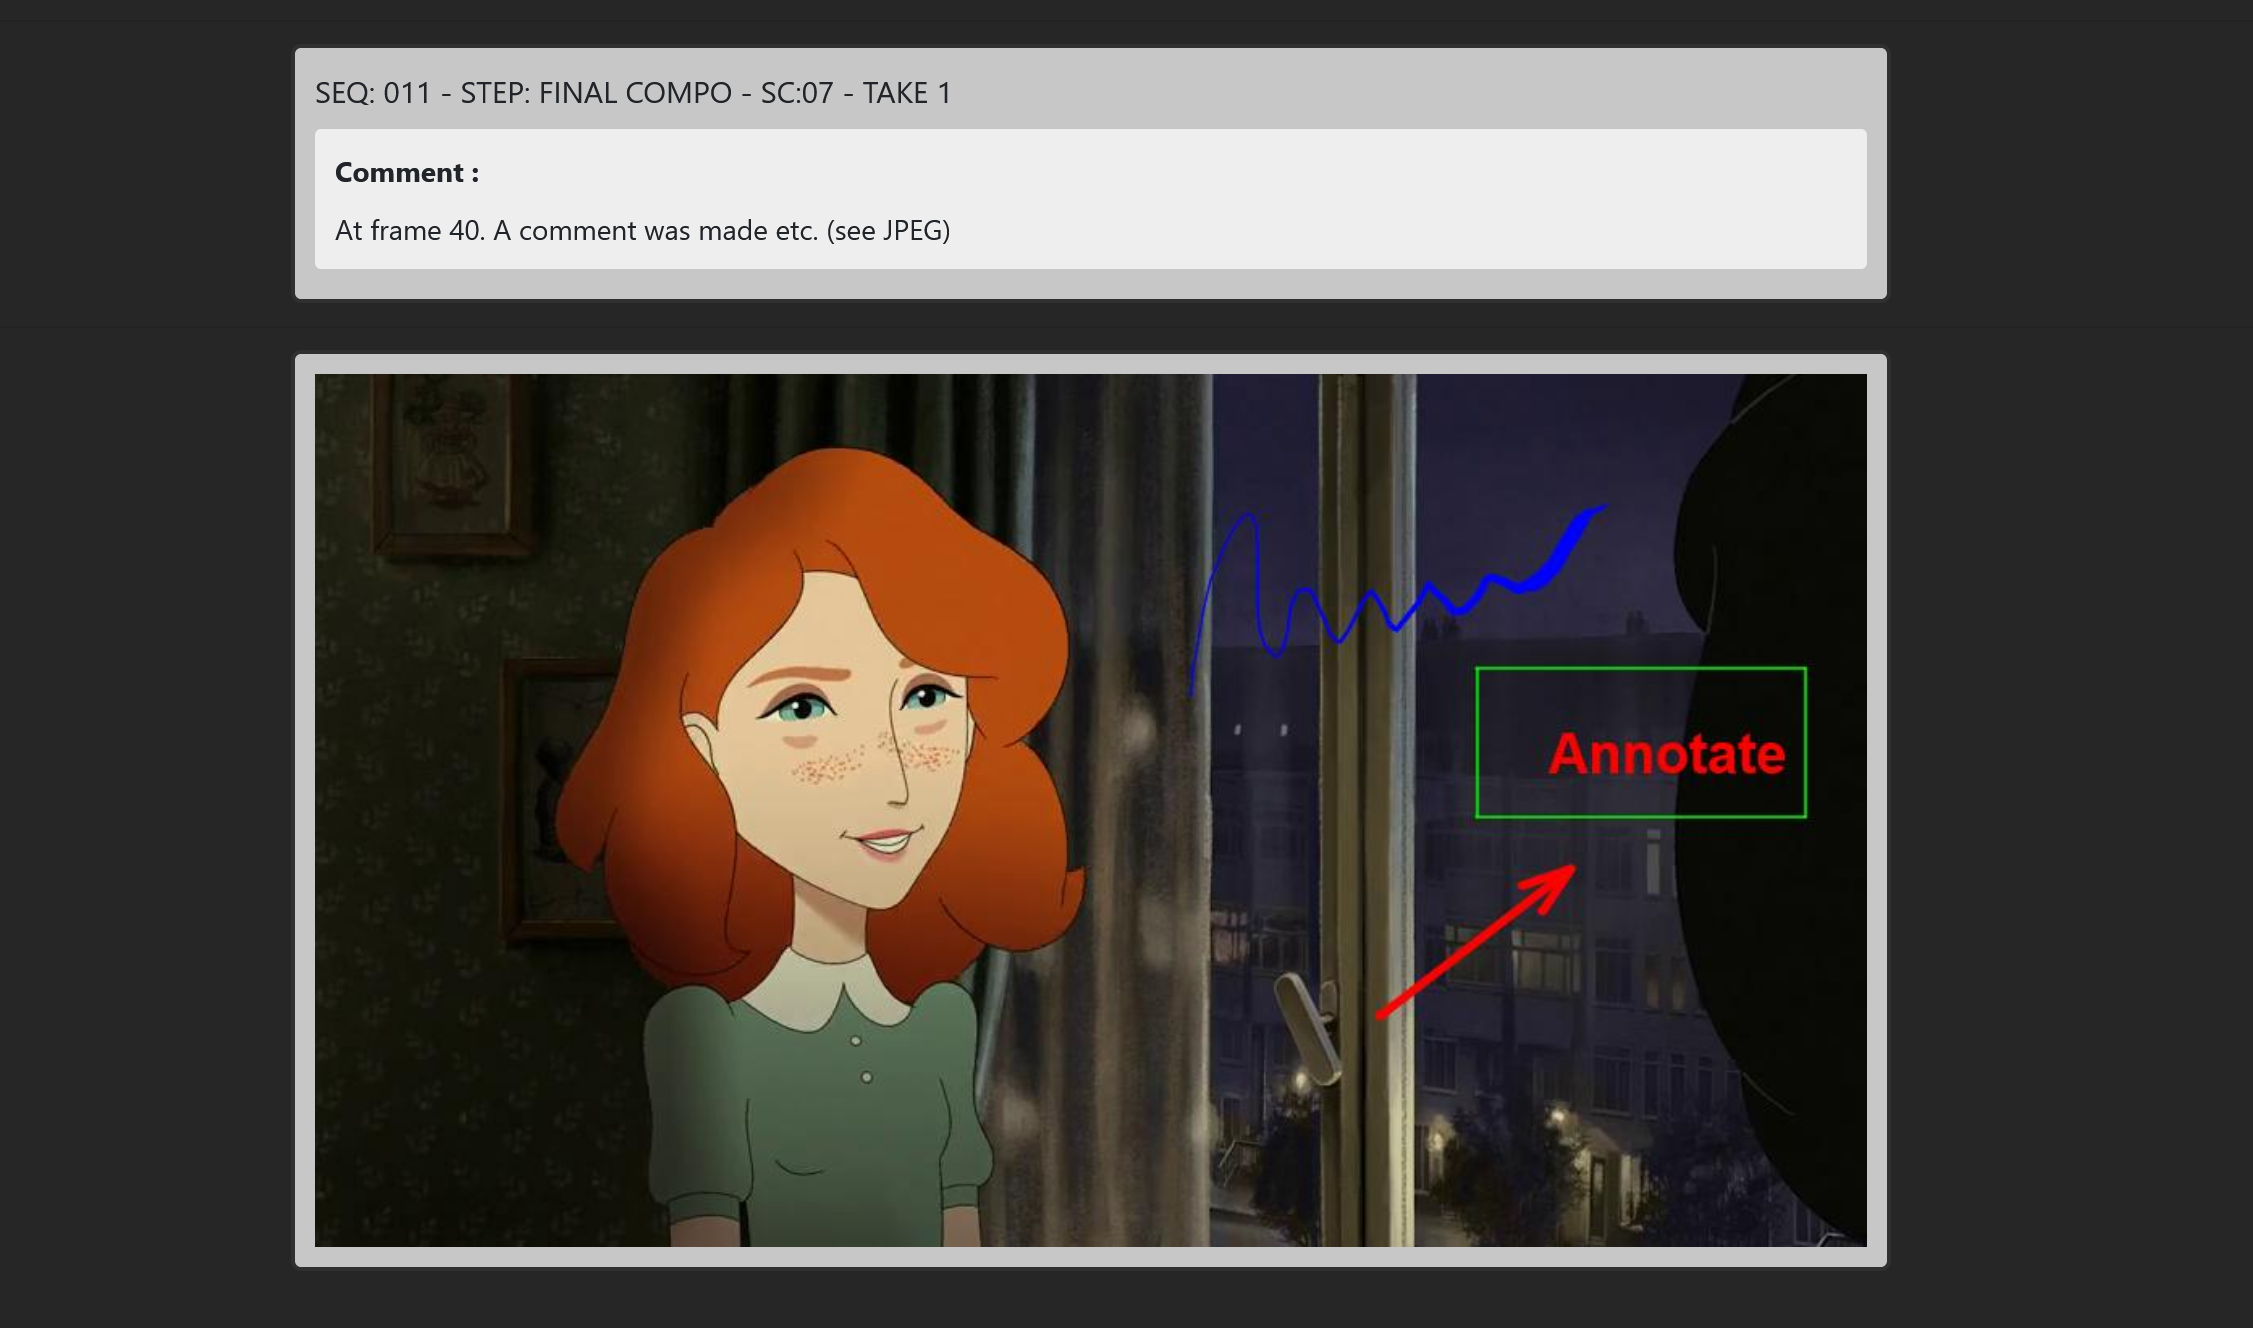
The JPEG mention in the media column indicates that a media was saved along the comment. You can retrieve this media by clicking on the JPEG mention:
# The image player
The image player will be launched whenever you hit the review button on images. It has the exact same User Interface and functionalities
as the video player. Please refer to the video player for documentation.
TIP
Note that the video over compare mode is especially useful to detect the slightest changes between two images.
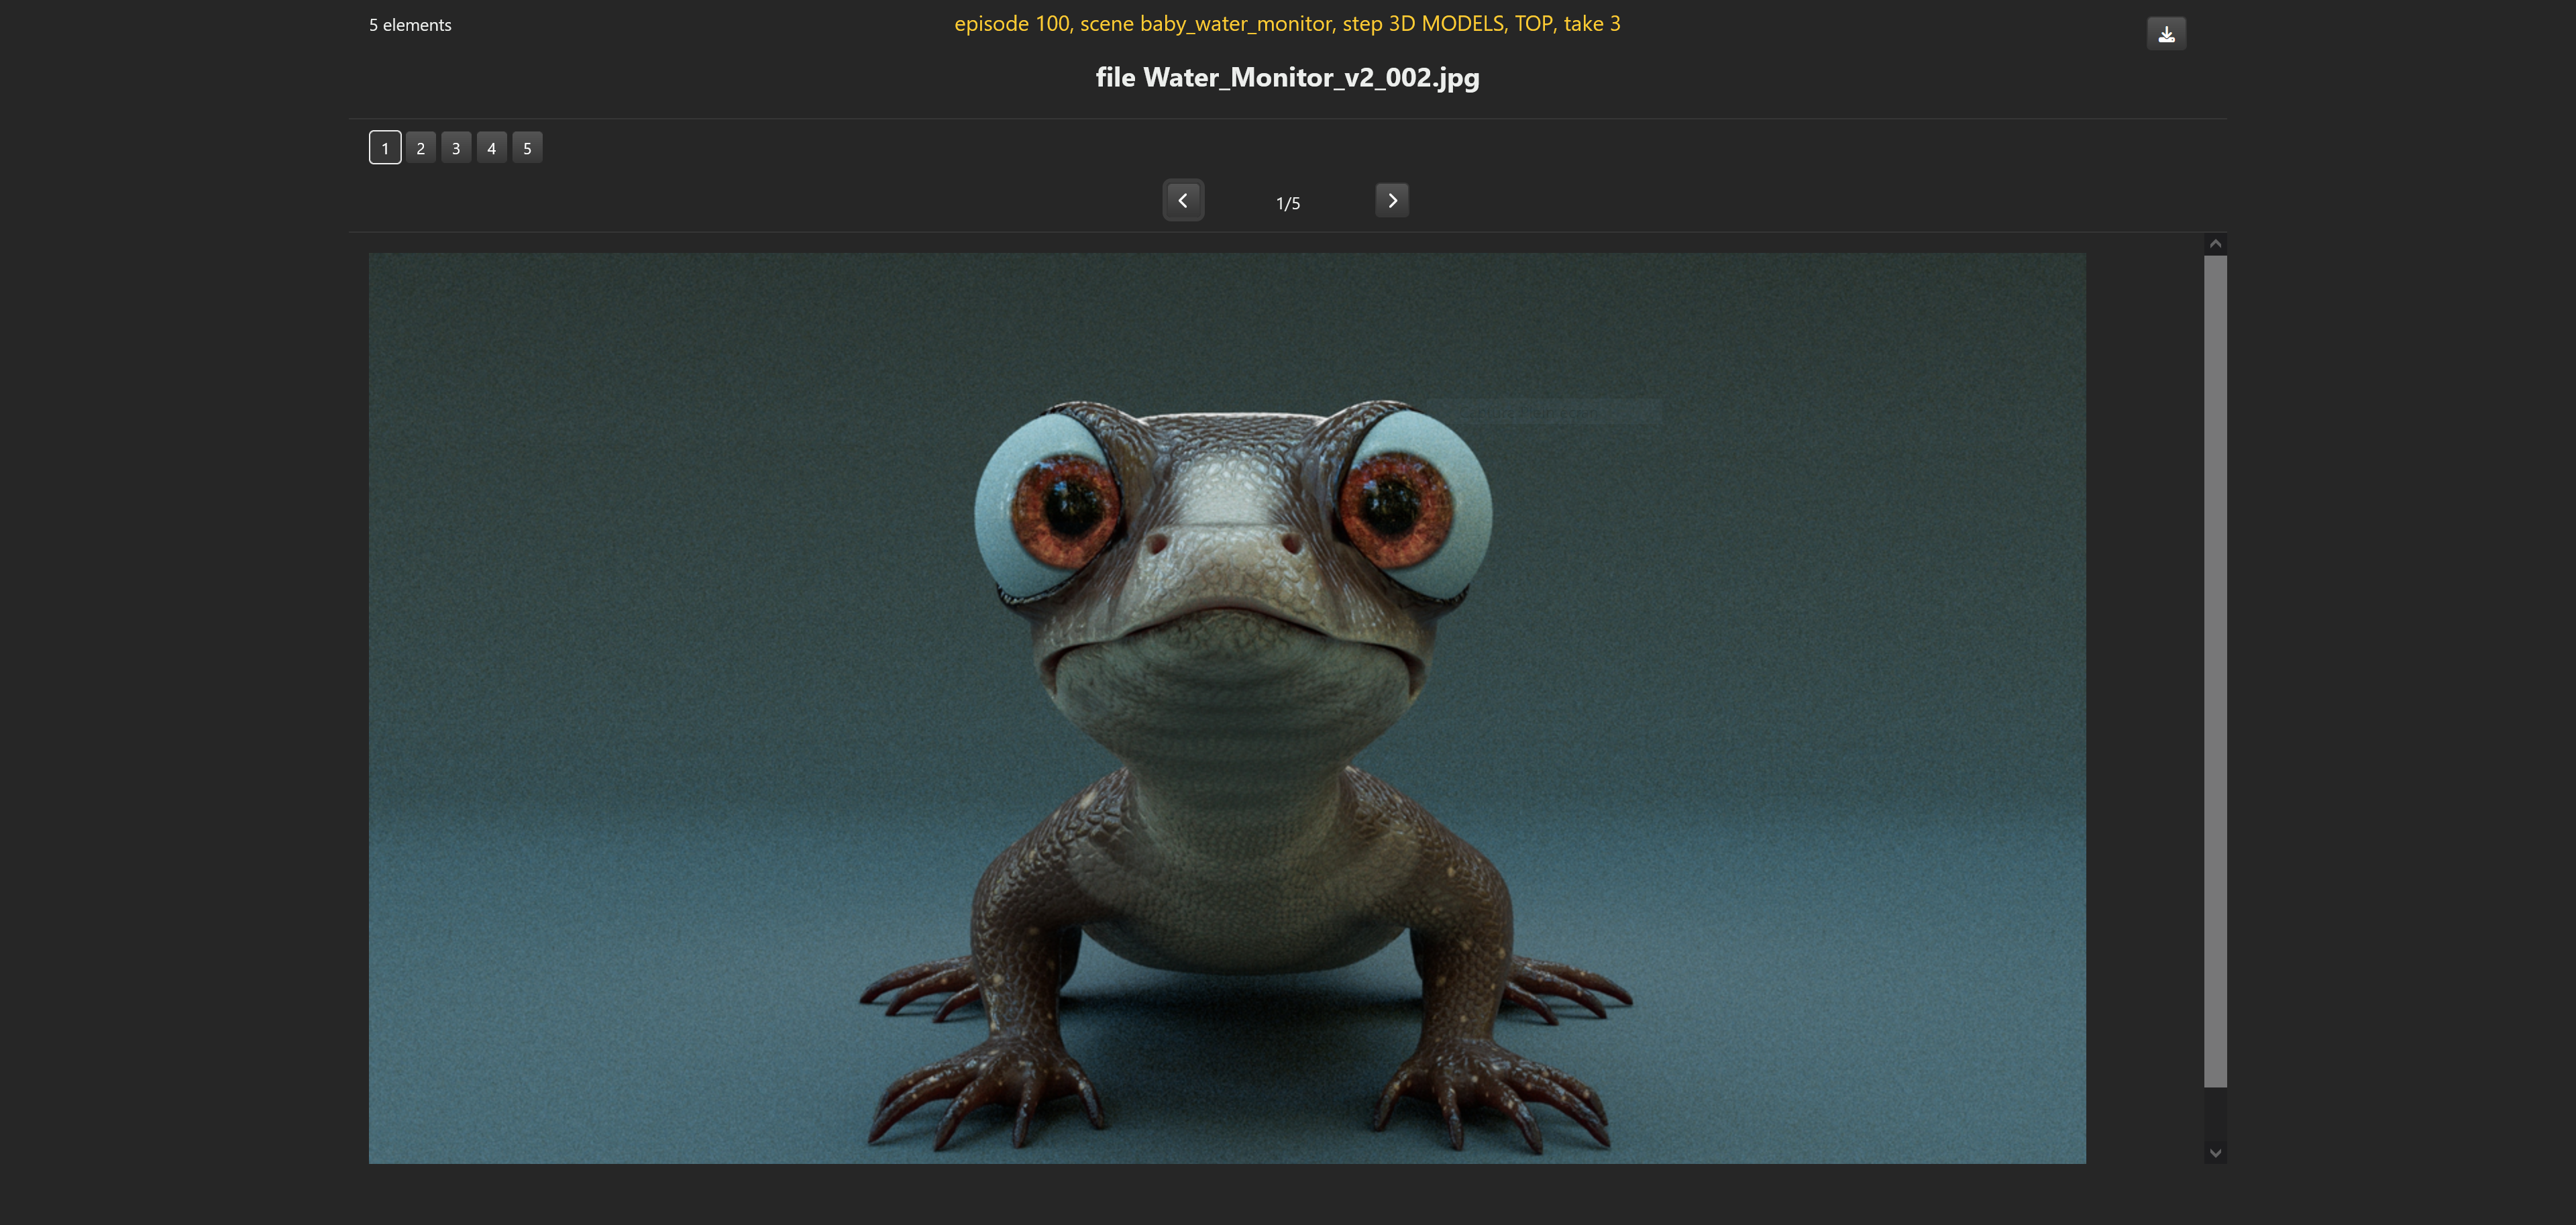
# The slideshow player
When multiple elements have been uploaded for an asset or an episodic shot, the slideshow player will be used to display and review all those elements. Multiple elements can be images, videos, audio or compressed or proprietary files (maya, fbx...). In the following example, 5 images have been uploaded for asset named "baby water monitor" at step 3D MODELS take 3:
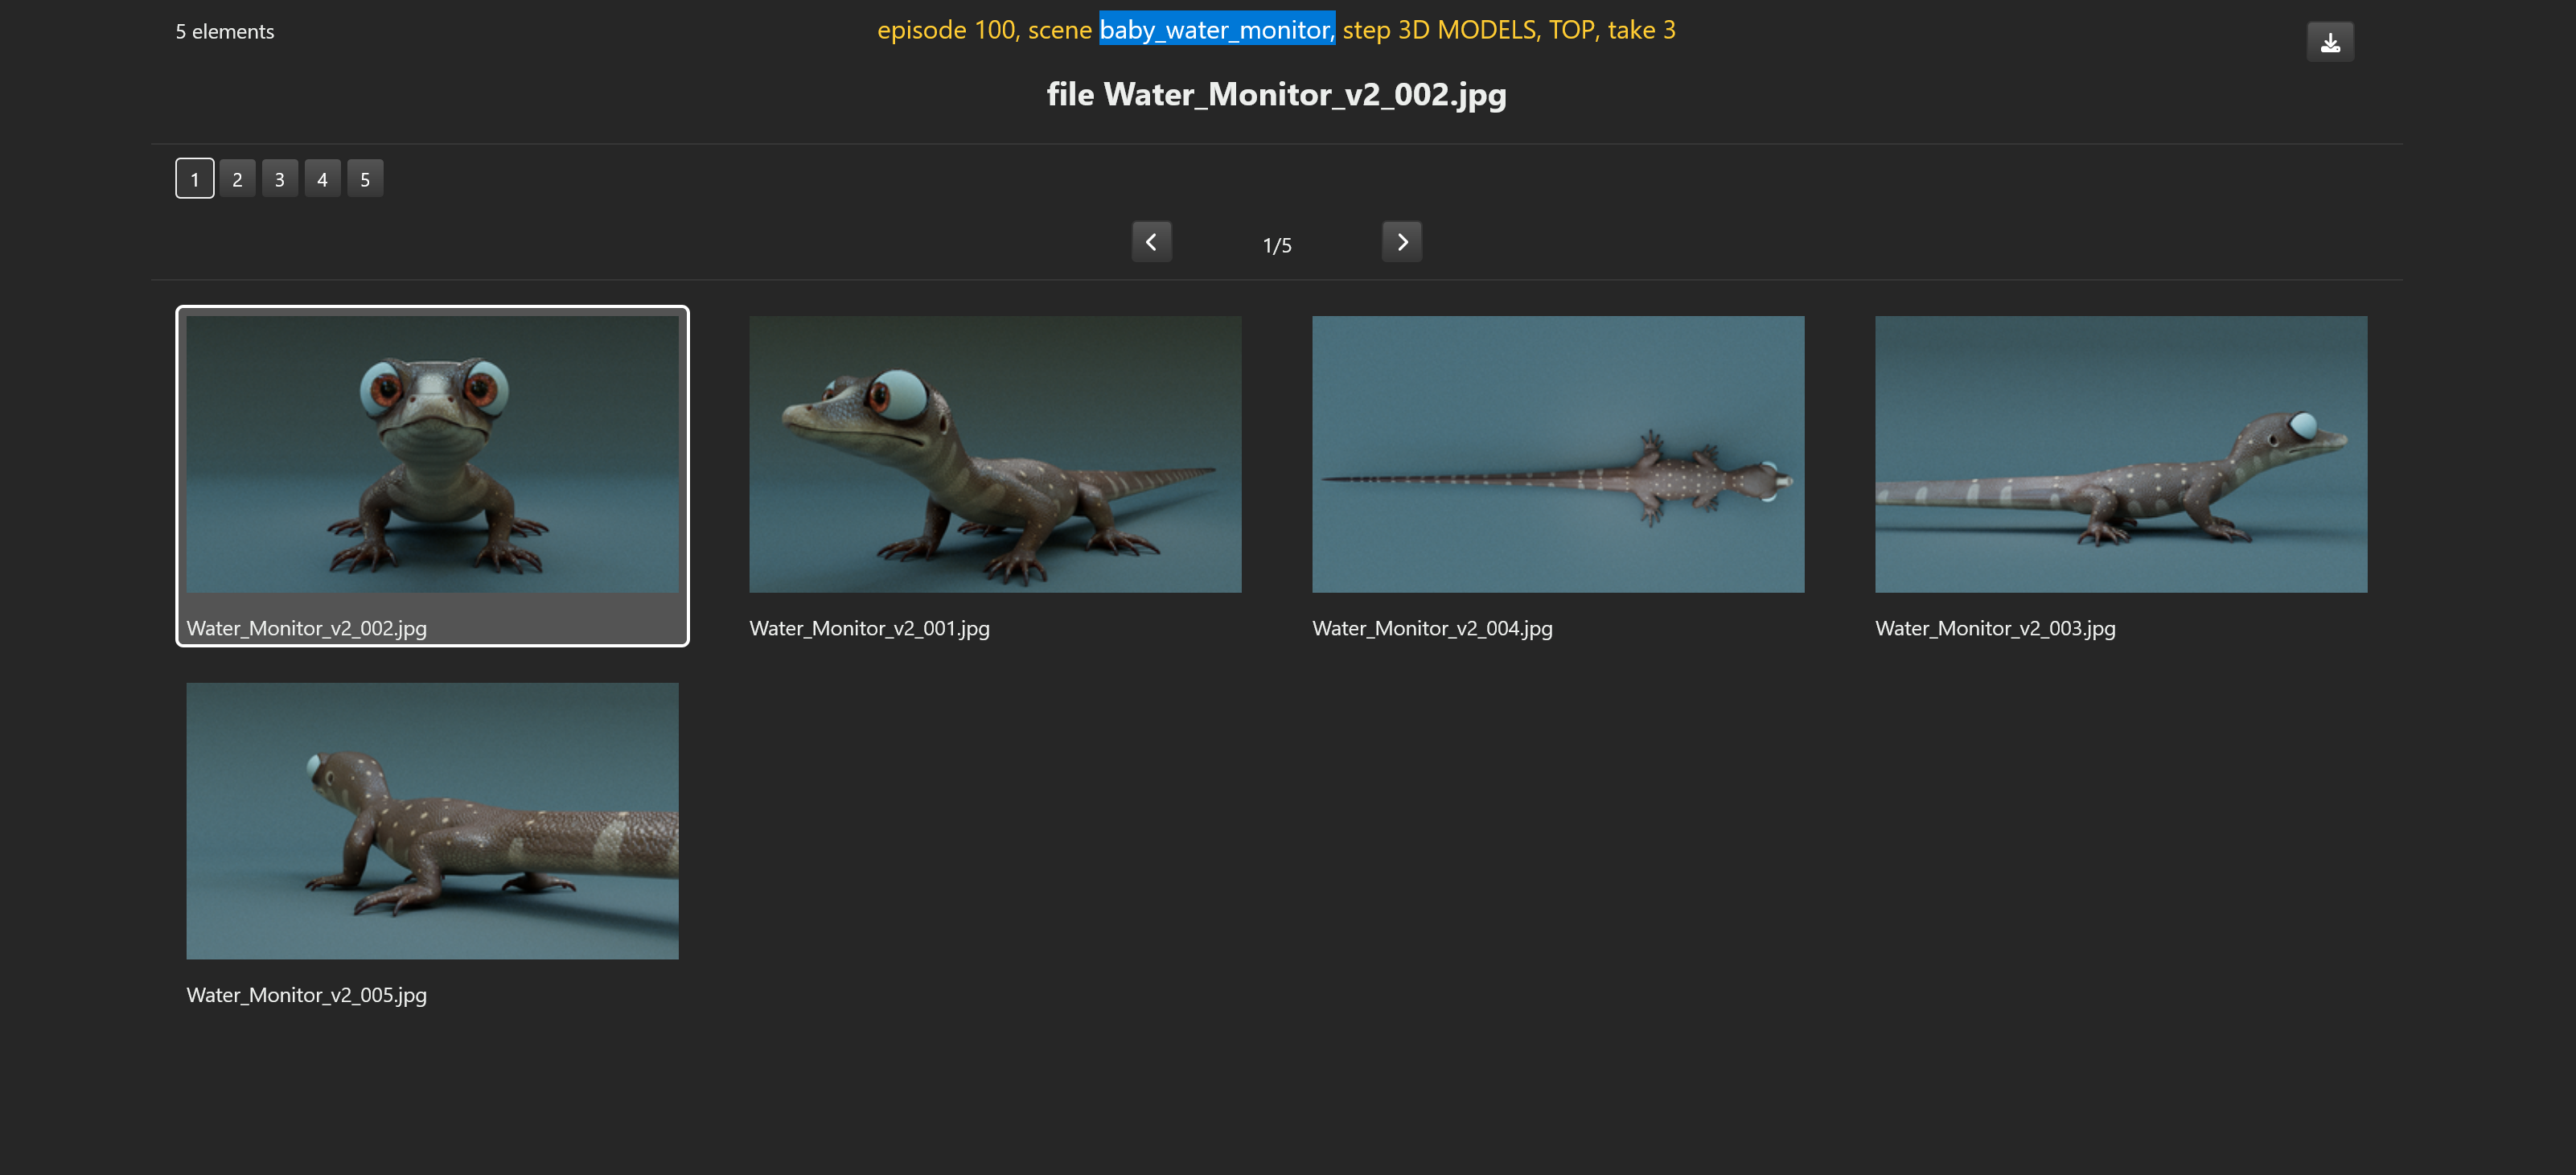
Using the < and > buttons will switch from contact sheet mode to slideshow and move to the next or previous image.
# The continuity player
Each episode in SPI consists of episodic shots which were created in the episode section. All the episodic shots from a single episode can eventually be assembled together into a video file called the episode continuity.
You may recall from the workflow section that every episodic shots follows a workflow starting with the animatic step and then moving up to more advanced steps until it reaches the final step which is often the compositing step. At any given time in the fabrication process of your projects, it is very likely, that episodic shots from a given episode will have reached different steps in their respective workflow. For example, one episodic shot may already be at the compositing step whereas another one will still be at the animation step or maybe the animatic step.
When you assemble episodic shots to build an episode continuity, the question is: which step are we going to choose for each episodic shot?
In the step creation/edition page, you can specify if a step will be included in the continuity. That way, you simply decide which step(s) will eventually be used for the continuity. Let's take a simple case where you decided to include the steps: animatic, layout, animation and compositing in the continuity. This will result in several continuities:
- The animatic continuity: the animatic step only will be used for the continuity (this is the animatic)
- The layout continuity: for each shot, the layout step if available otherwise the animatic step will be used to build the continuity
- The animation continuity: the animation step if available otherwise the layout step if available otherwise the animatic will be used to build the continuity
- The compositing continuity: for each shot, the most recent step will be used to be part of the continuity: compositing is available otherwise animation if available otherwise layout otherwise animatic
In this example, the continuity up to compositing represents the latest and most up to date version of your episode i.e. this is the latest rough cut edit of your episode.
The view continuities button can be used to launch the continuity player for the selected epsiode:

The build continuities button will be used to recompute all the continuities as per your settings at any given time.
WARNING
Note that computing continuities for a 11 minuts episode comprised of 200 shots might take several minuts. This CPU intensive task runs as a background process and an email will be sent to you when all continuities will have been built.
TIP
Suppose that several shots have just been submitted by studio(s) and CG artist(s) at step(s) which are included in the continuity.
If you hit the build continuities button, this will ensure that you will visualize and review the very latest version of your episode.
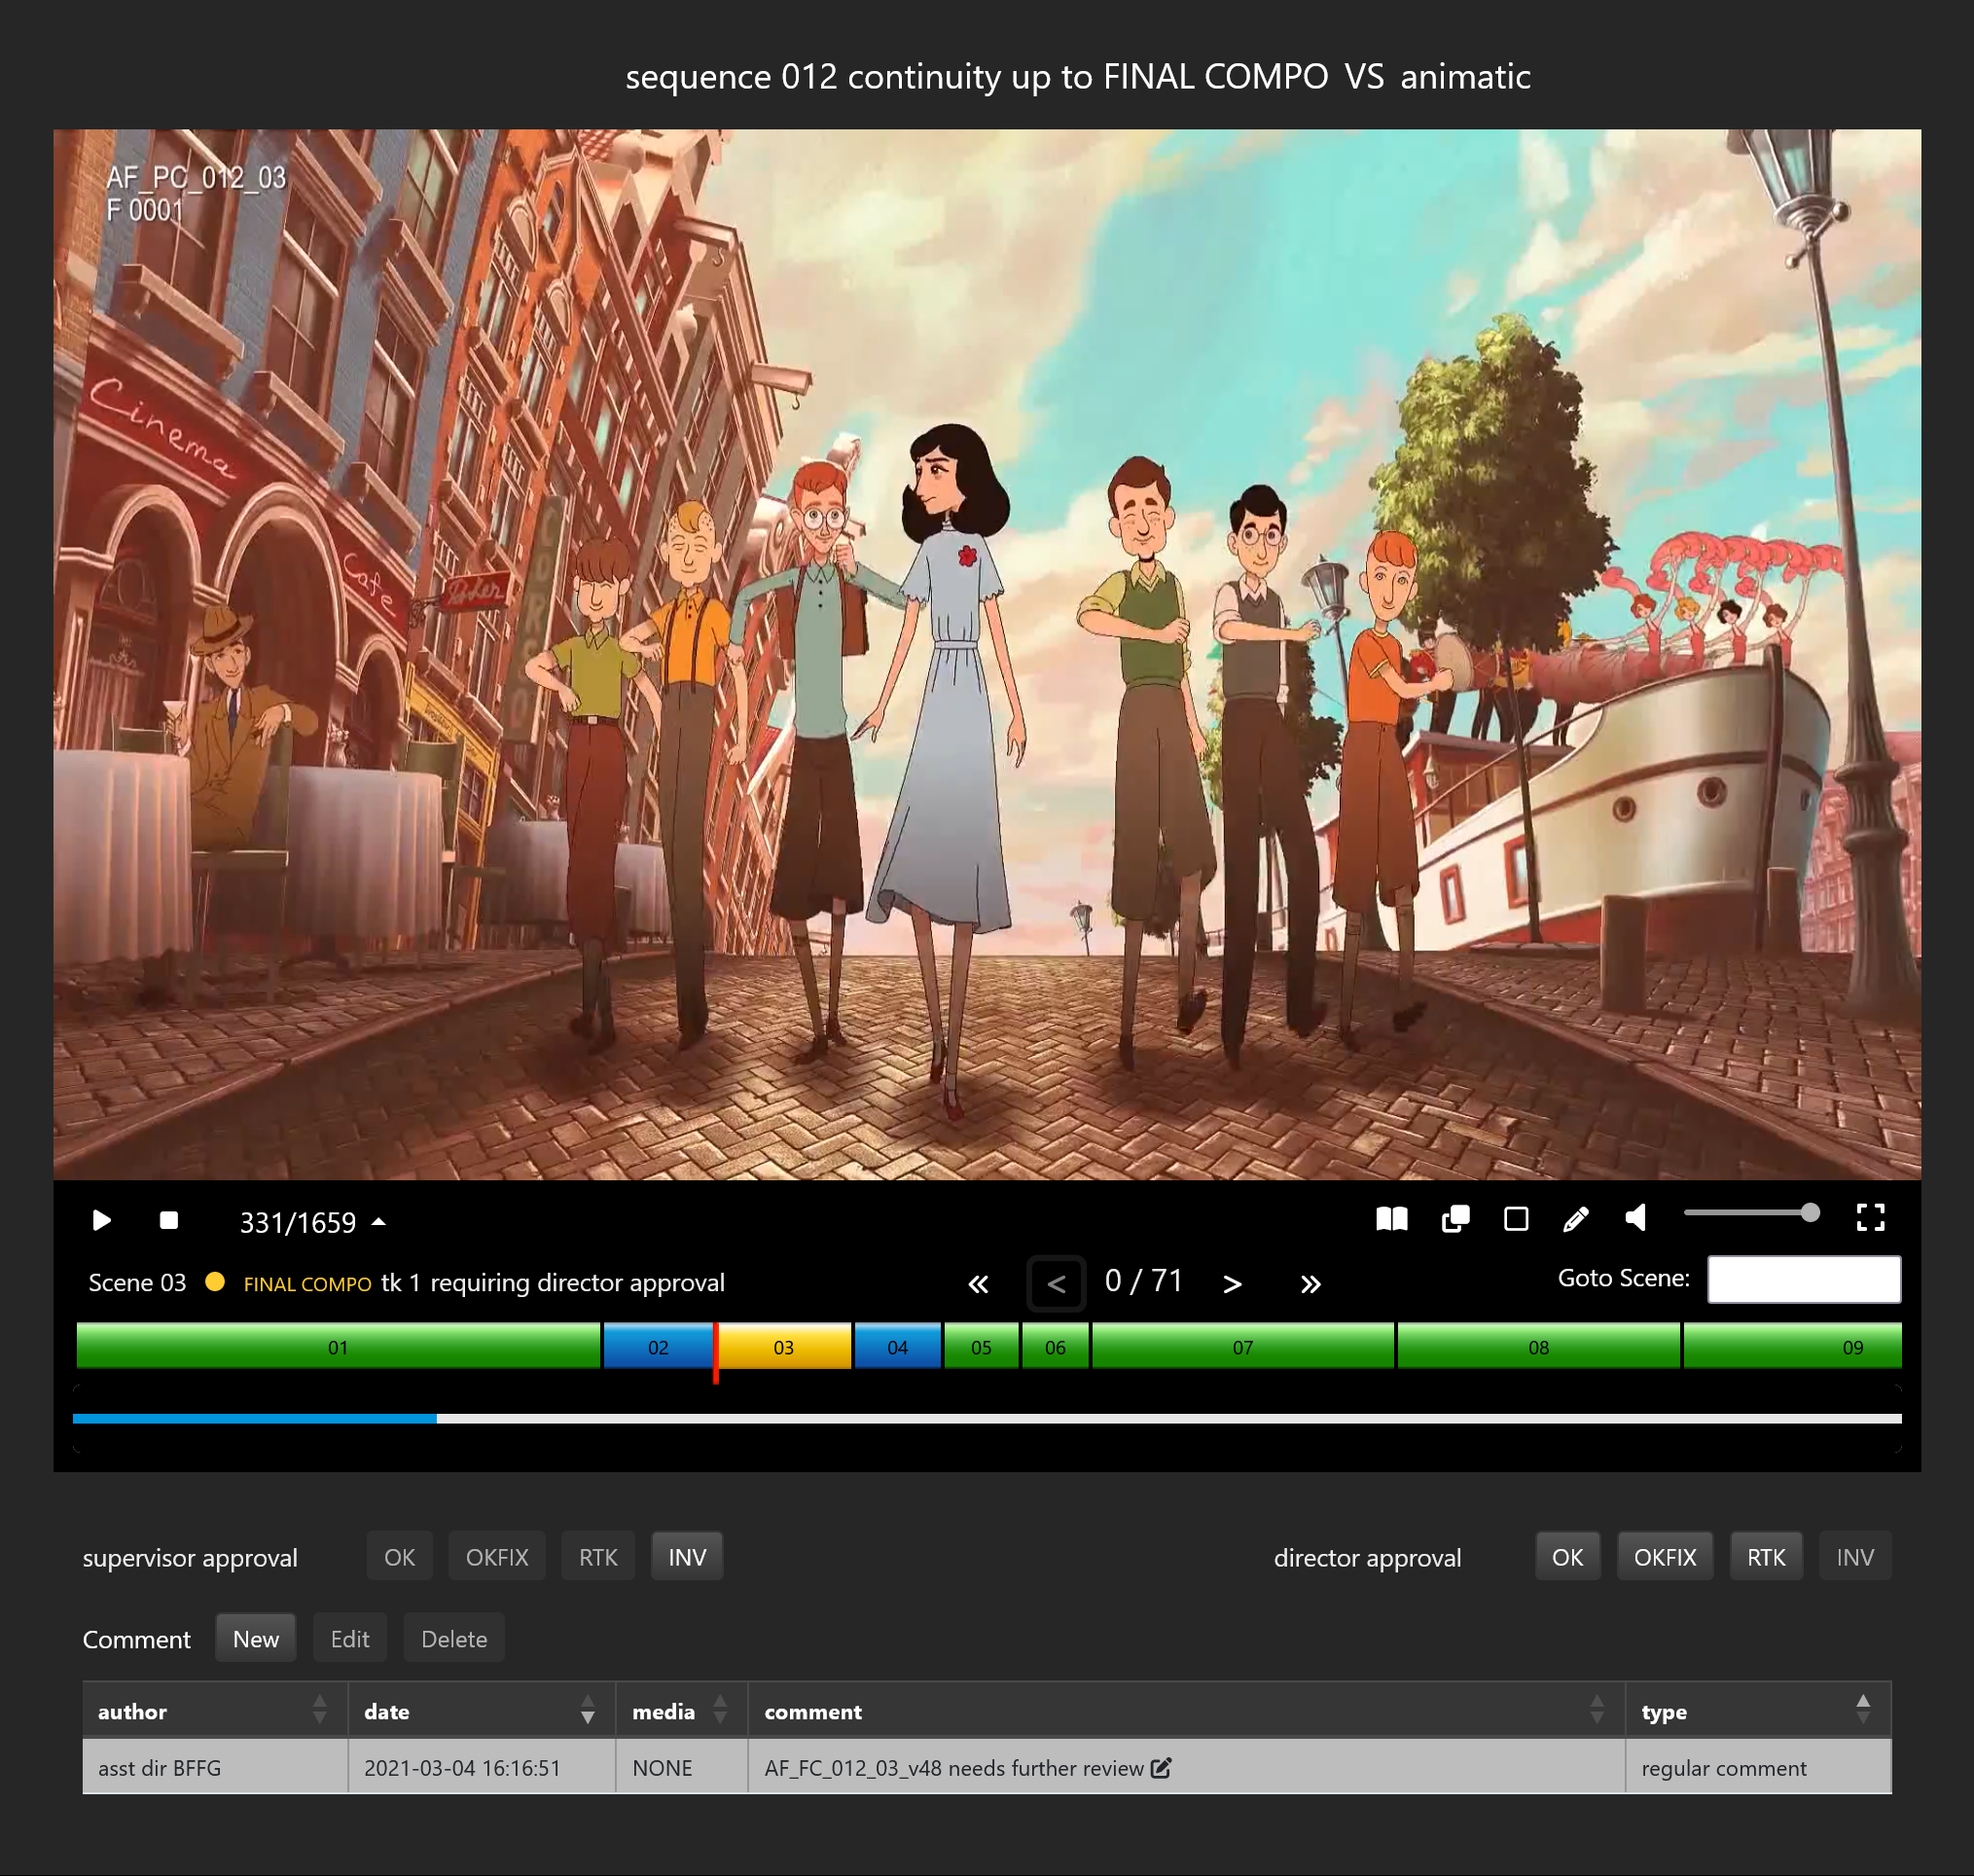
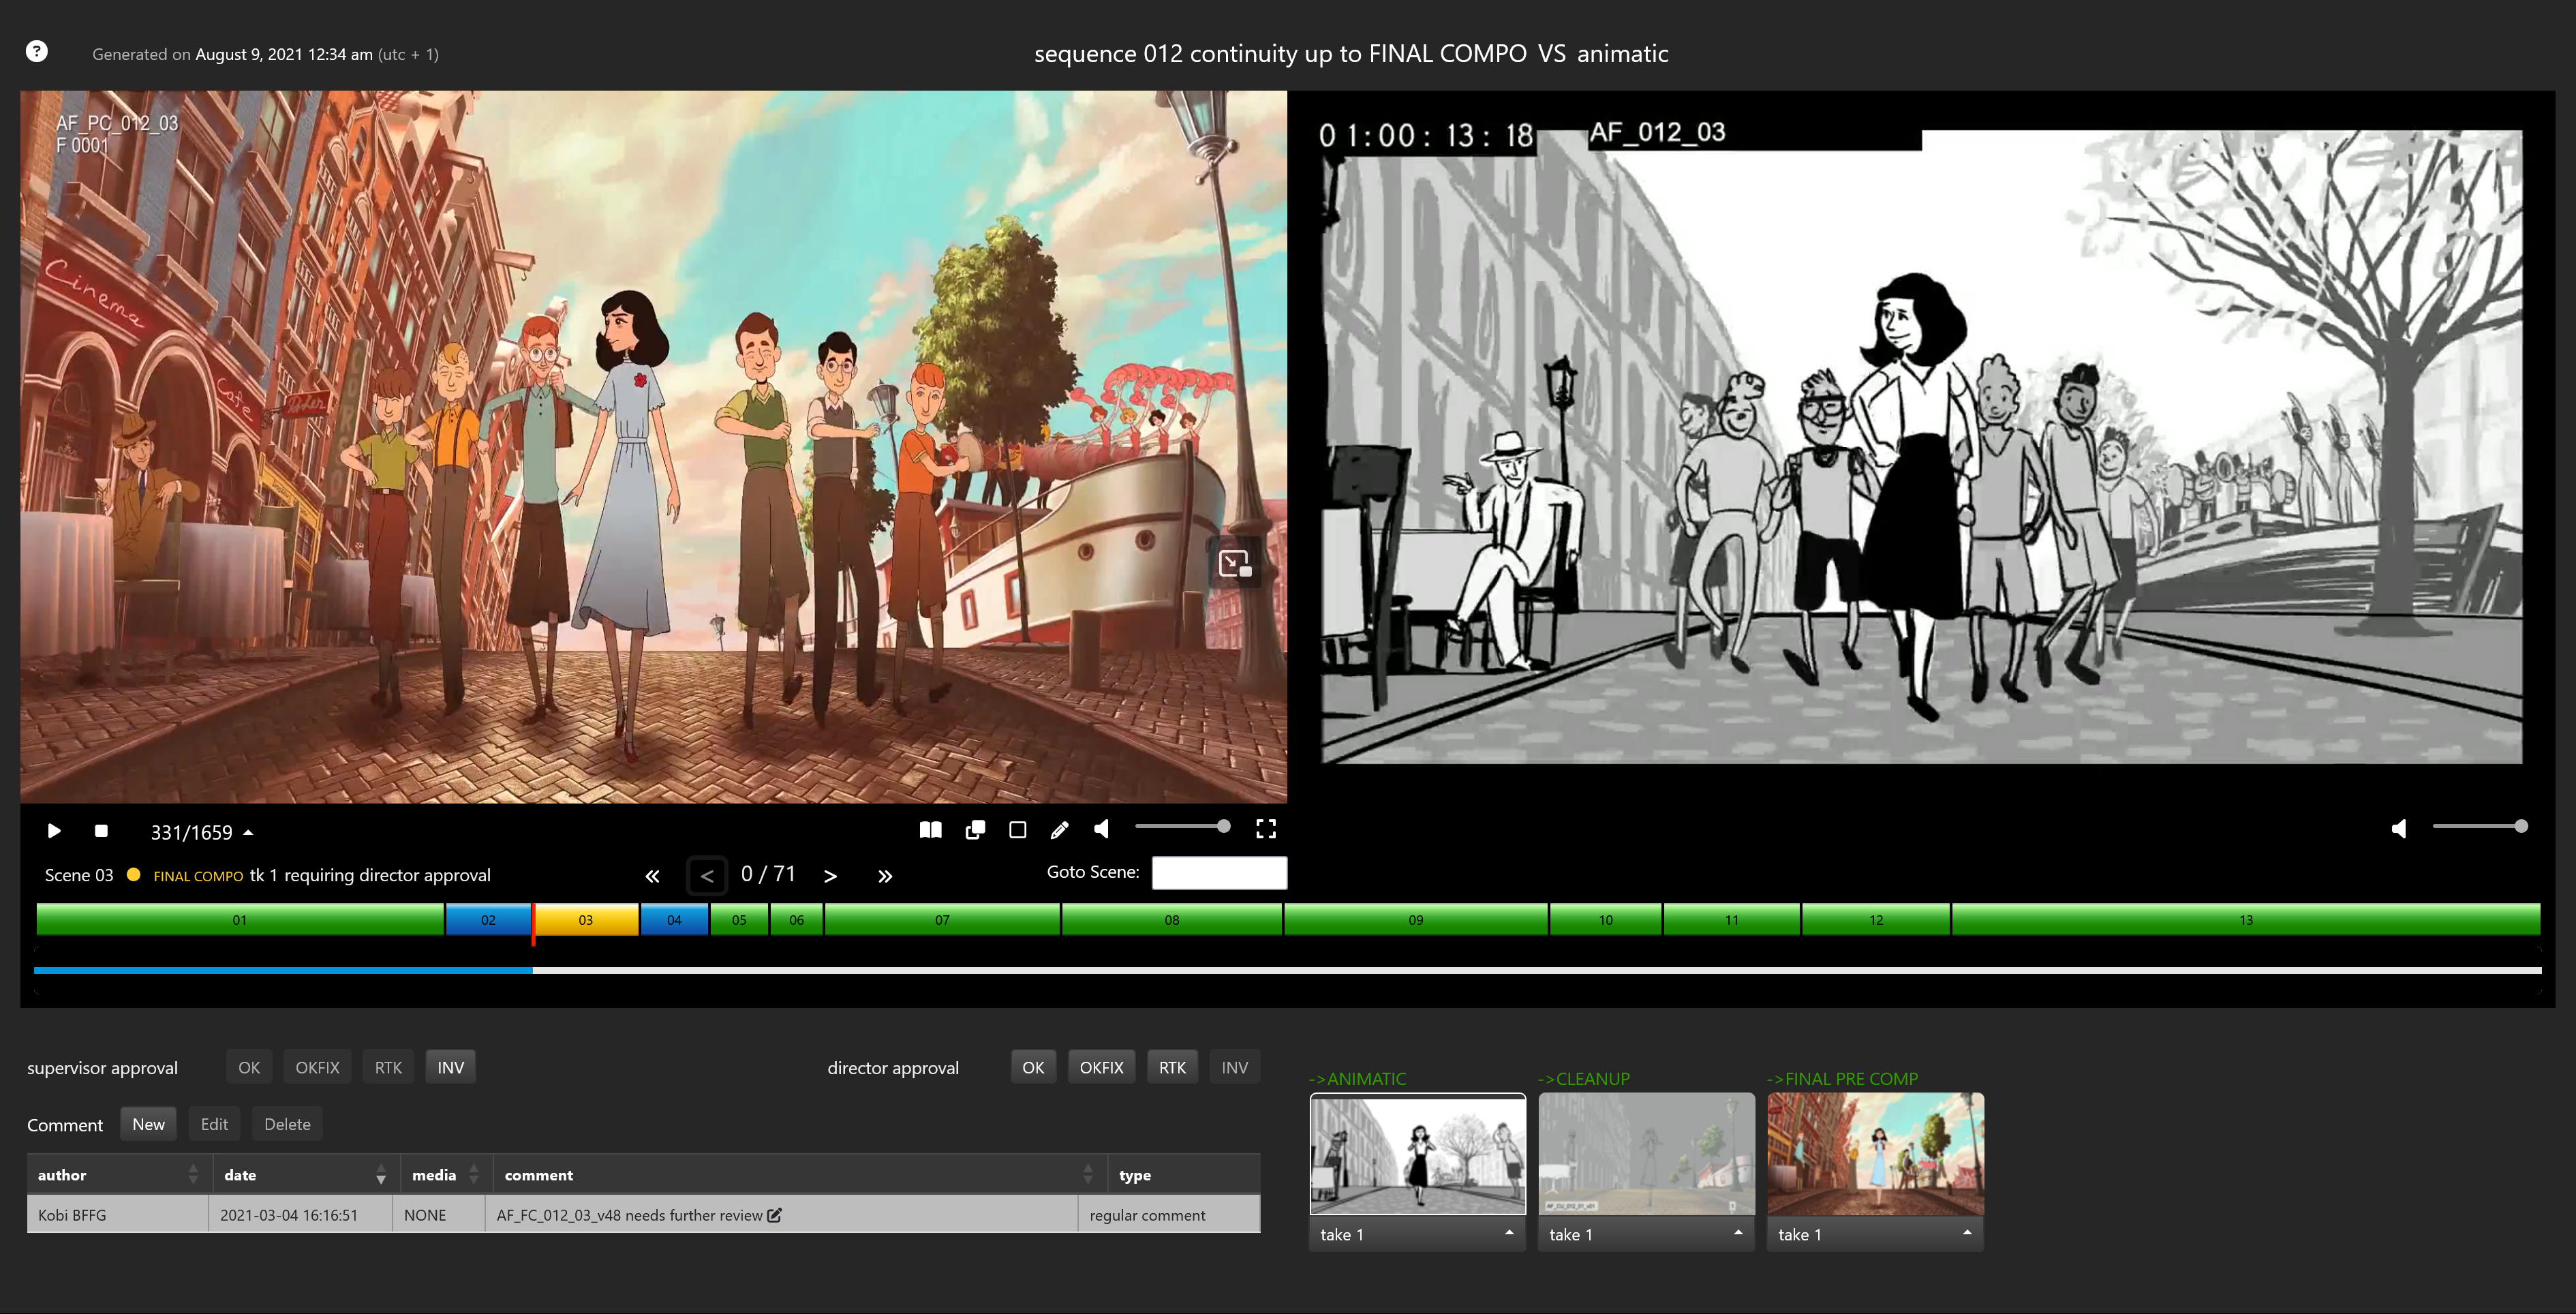
The continuity player provides a visualization of all those continuities. All the video player reviewing tools (compare, annotate, comment) are also available in the continuity player. The continuity player provides a comparison between all different continuities. In the following example, we included steps animatic, cleanup, final precomp and final compo in the continuity and we decided to compare the continuity up to final compo against the animatic:
TIP
Since the status of every episodic shot is displayed along with the comments pertaining to this shot, reviewing can also be done in the continuity player.