
# Reports
This is the place where you can create and edit custom production reports. Once you have built your custom report, you can also save it as a view hence making it
immediately available for your next sessions. The main idea behind custom reports is to concatenate very simple conditions with the logical operators
AND OR NOT and to display all the scenes which fill all those conditions along with some information.
For example, if you want a report that will list all the episodic shots of episode 001 delivered by studio X which have been approved at the COMPOSITING step, you will want to display:
- shots from episode 001 and
- shots at the COMPOSITING step and
- shots with the status APPROVED and
- shots submitted by studio X
With the ability to build and assemble conditions, the custom reports page allows you to come up with a wide range of production reports.
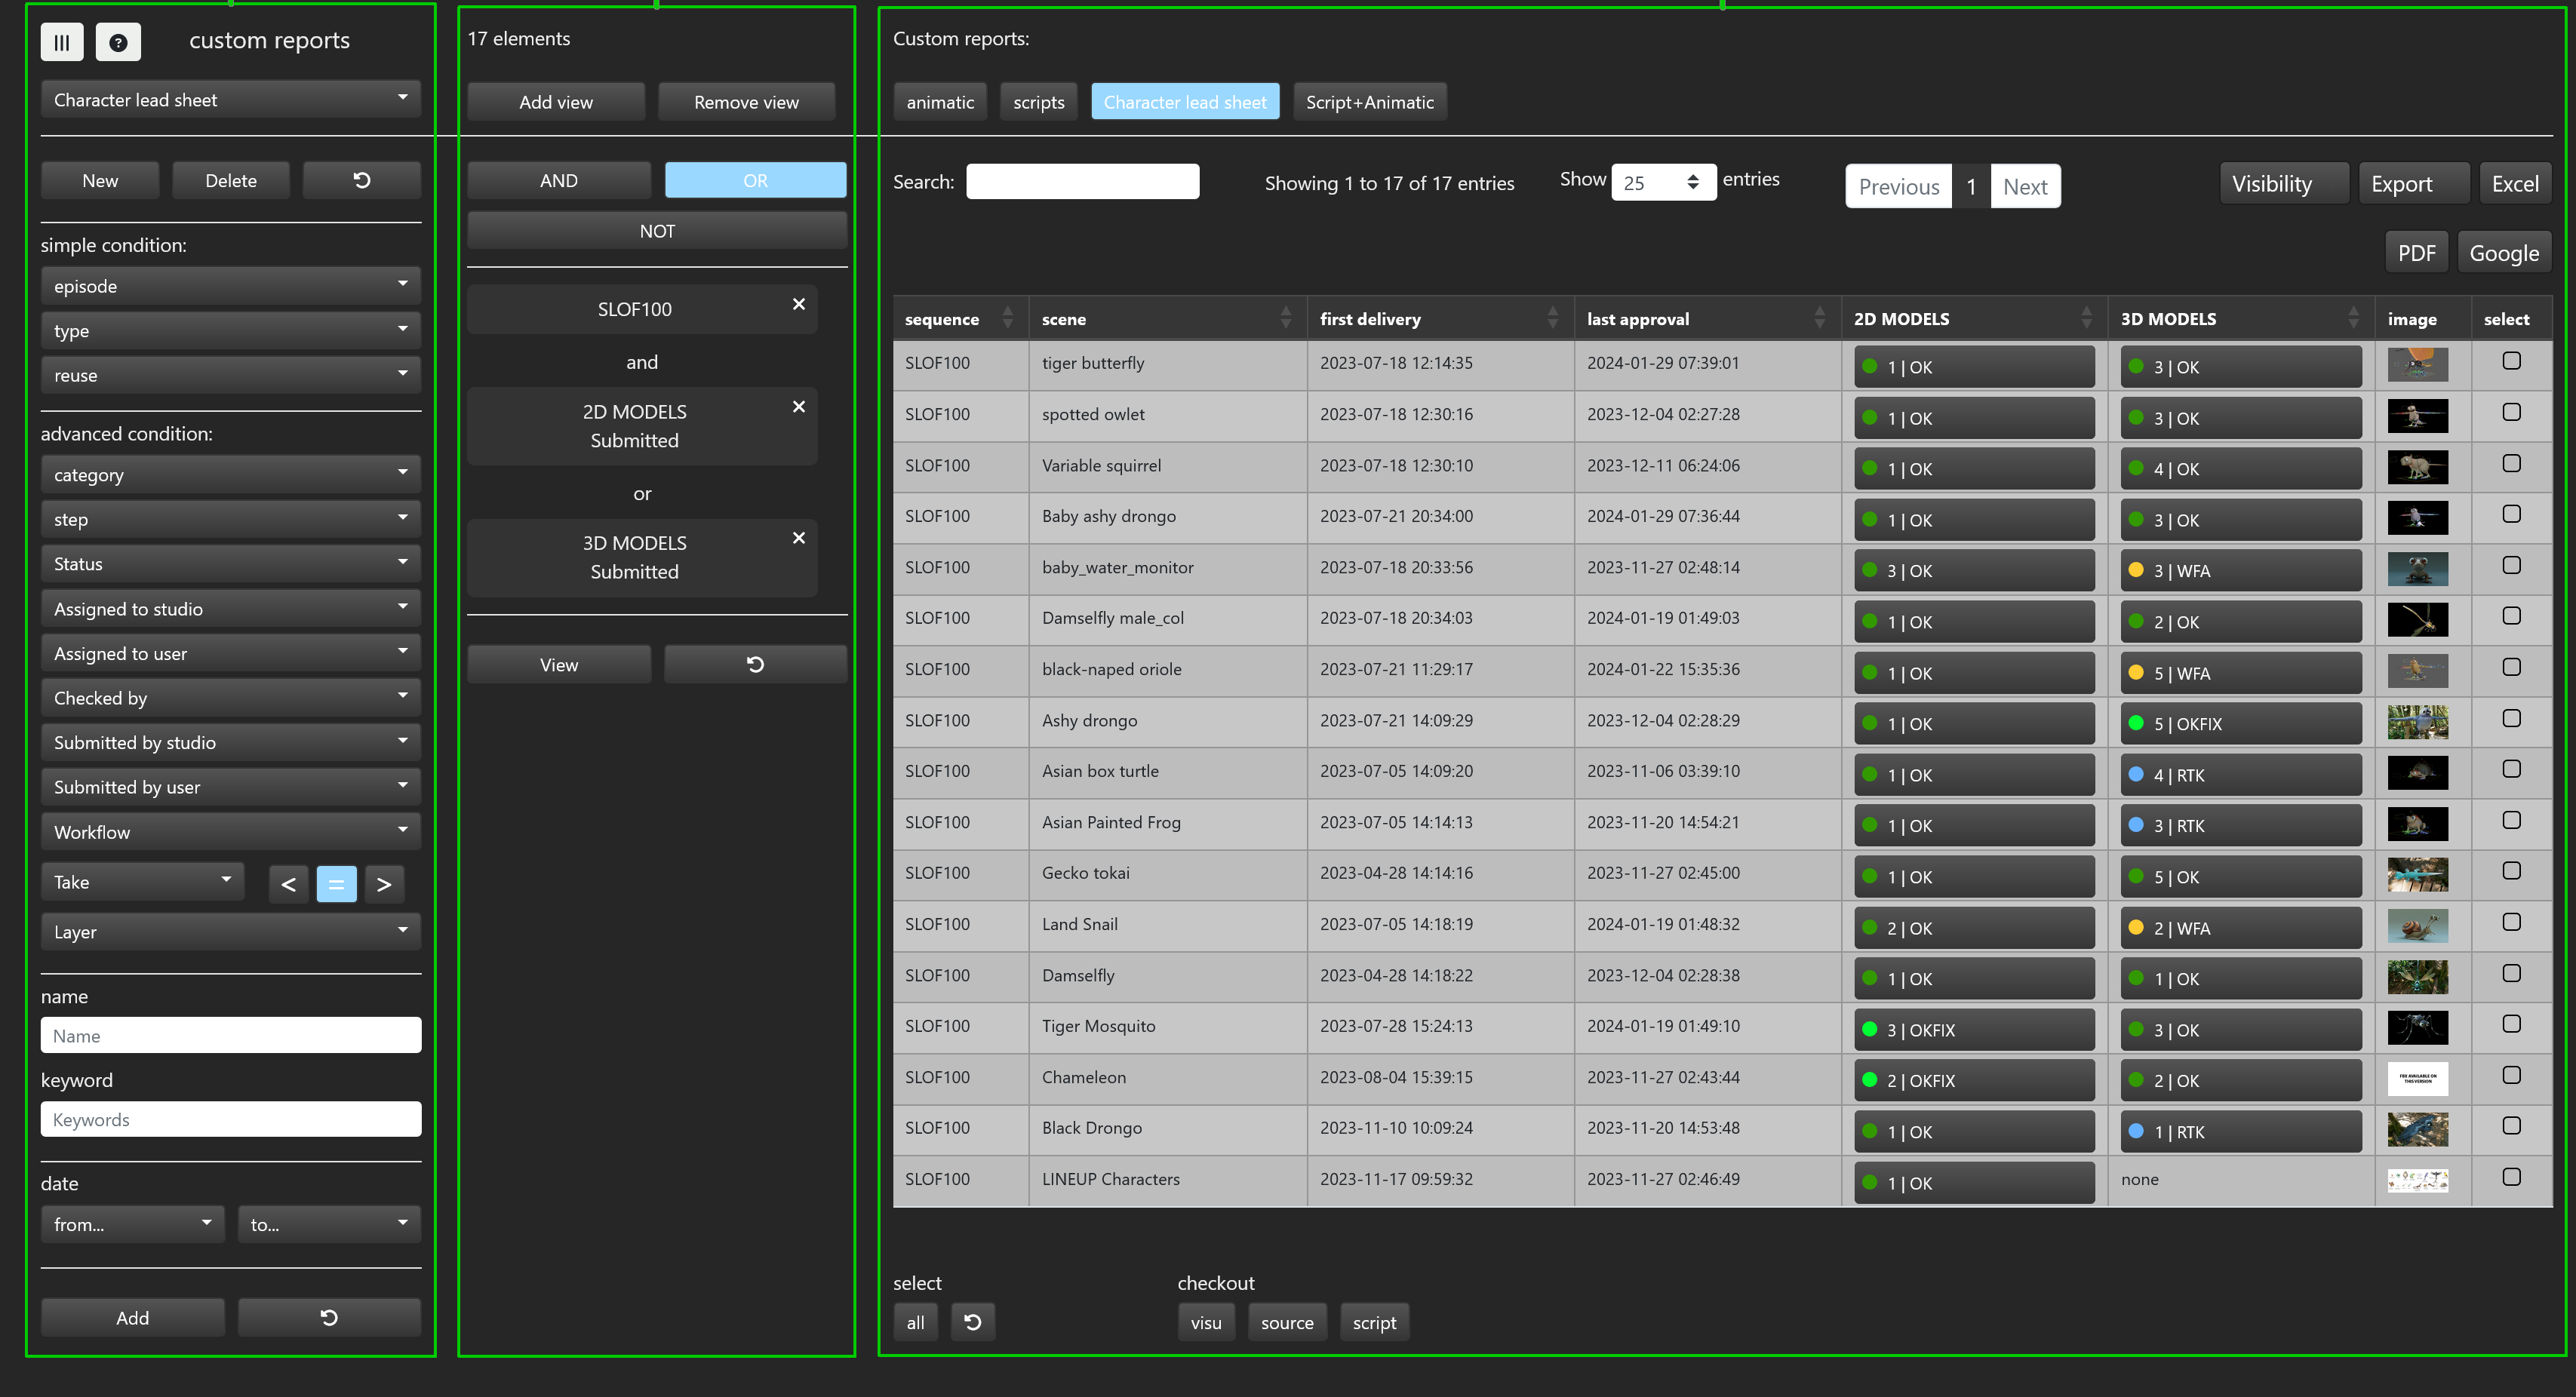
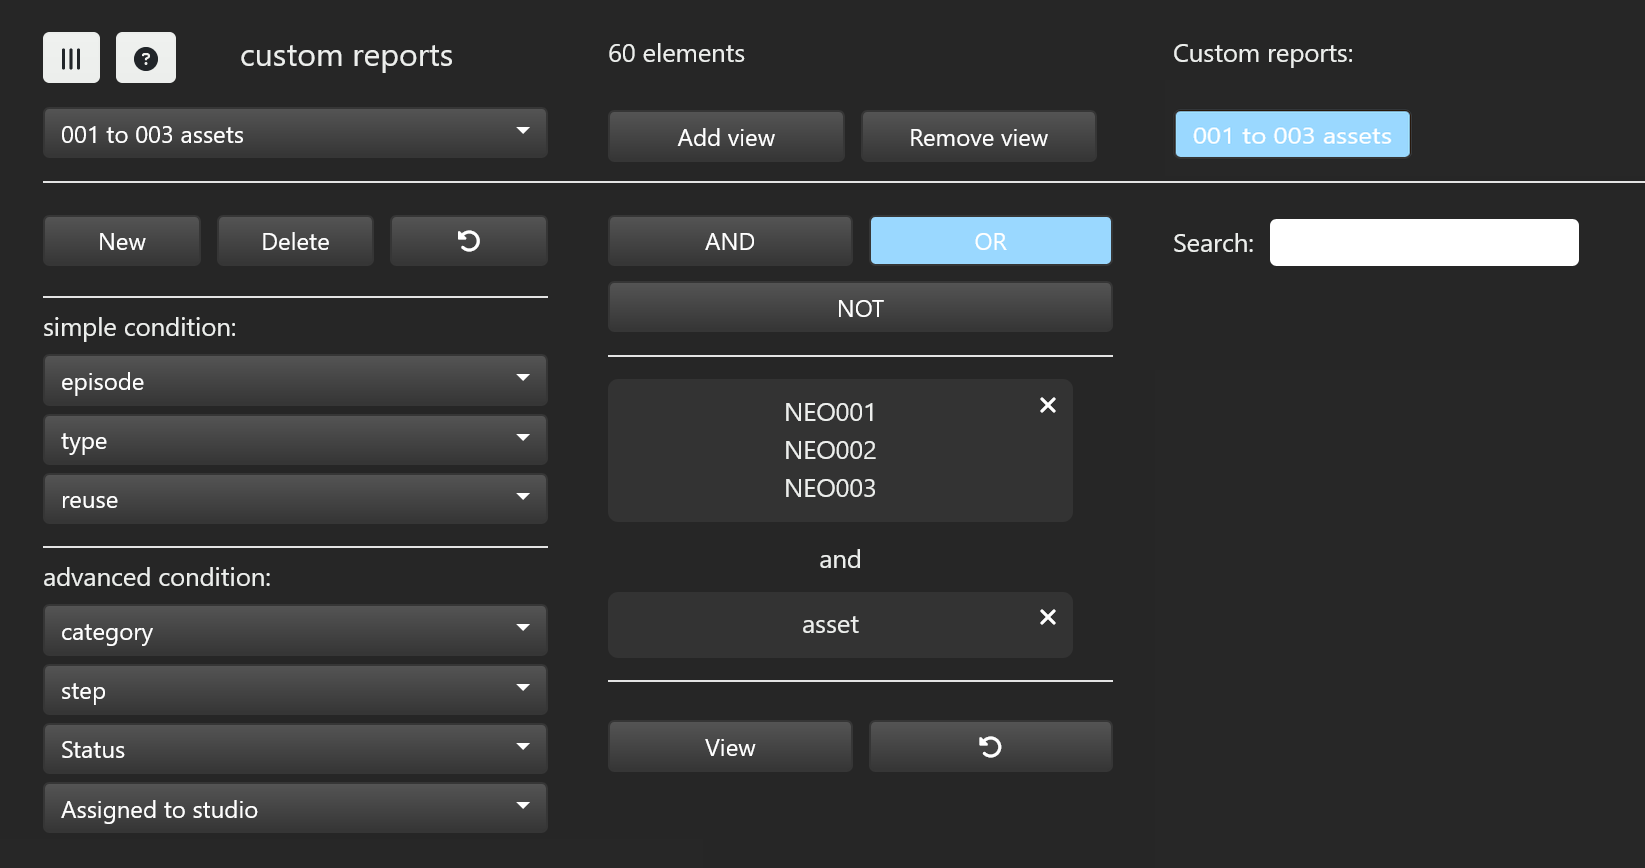
The custom reports page is divided vertically in three sections:
- the left section is where you select and build conditions
- the middle section allows you to select the logical operator between conditions and displays all the conditions you added in text form
- the right section will display all the scenes which fill the current list of conditions
# How to select and build conditions?
The left section of the page allows you to:
- select, create, delete a view or reset the current view
- edit a simple condition
- edit advanced condition(s)
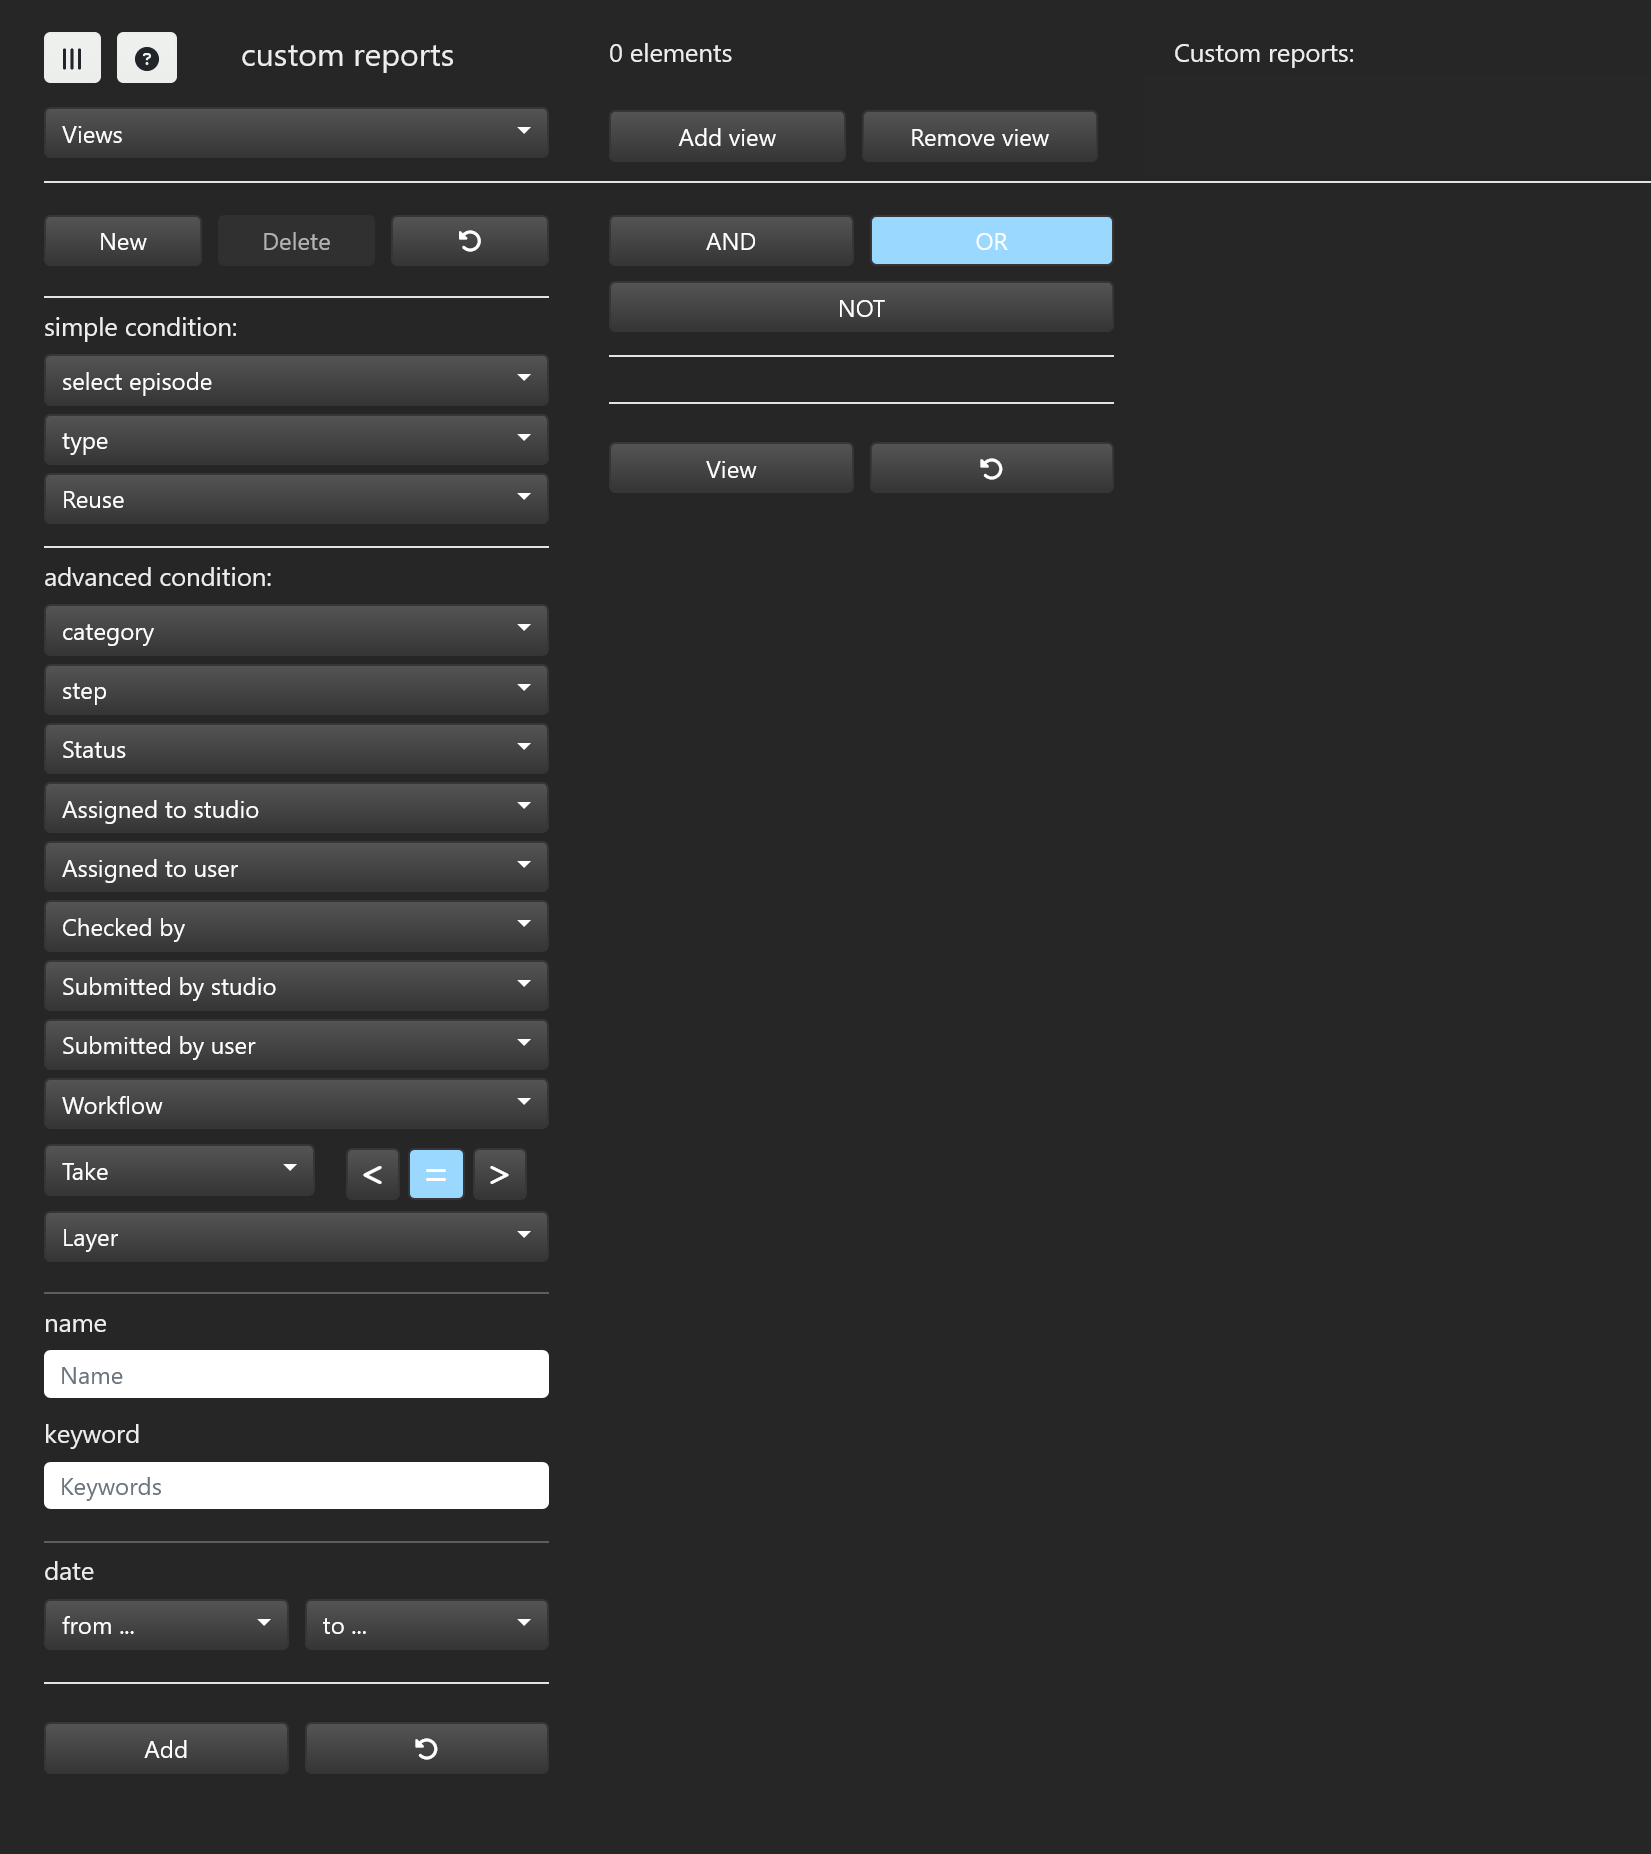
Conditions can be combined together with the AND OR NOT logical operators.
The resulting condition is built as follows: (simple condition) AND (advanced conditions)
# Simple condition
Simple condition is usually used to specify one or more episodes and the type of elements (assets or episodic shots). The simple condition is built as follows:
(simple condition) = (episode1 OR episode2 ... OR episodeN) AND (type selected) AND (reuse selected)
The select episode type reuse pulldown menus are used to specify this condition.
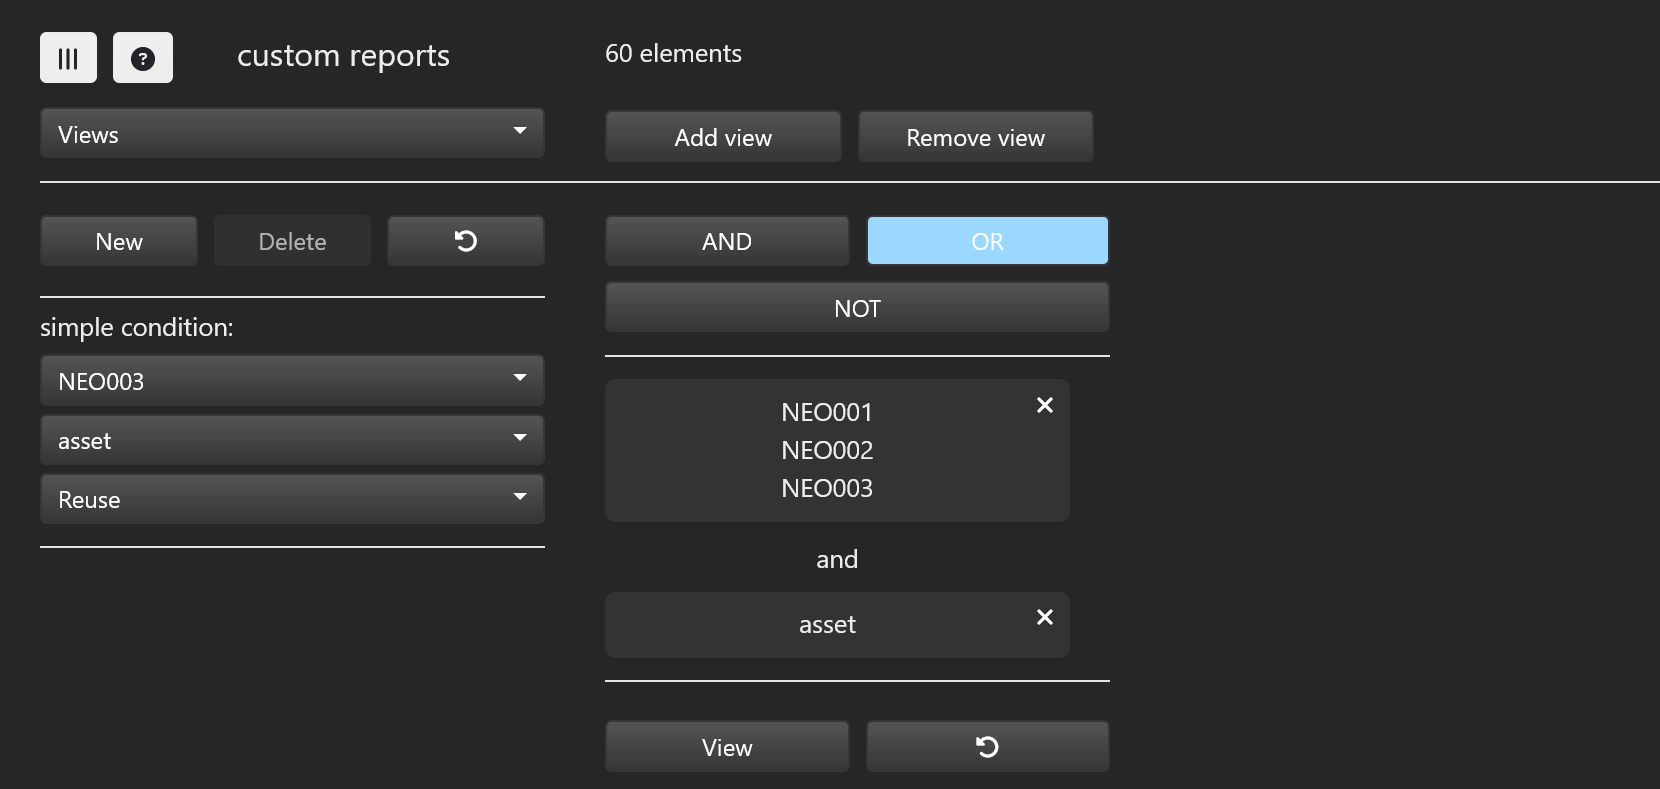
Suppose for example that you want to display all the assets from episode 001, 002 and 003, you will then do the following actions:
- select episode 001 from the
select episodepulldown menu - select episode 002 from the
select episodepulldown menu - select episode 003 from the
select episodepulldown menu - select asset from the
typepulldown menu
Once you select a parameter among episode, type or reuse, the new resulting condition is updated in the middle section:
# Advanced conditions
An advanced condition is built from the following set of parameters.
You may choose and select several of these parameters then click the Add button to add this advanced condition to
the current list of conditions which will be updated in the middle section.
Note that when you select two or more parameters from the list, they will all be combined with the AND operator.
When you hit the Add button, your advanced condition will be added to the list of conditions preceded by the logical
operator you previously selected before unless it is the first advanced condition you add.
You may add as many advanced conditions as you want.
TIP
We do recommend that you frequently save your current list of conditions when you start building conditions.
# Saving views
At any time, you can use the New to save your list of conditions as a view. It will prompt you for the name of this new view.
Once you have created a view, you also can add it to the list of custom reports with the Add view button. You will then have a
direct access to this report from the custom view page.
On the previous example, we decided to save our view as "001 to 003 assets" and to add it to the list of custom reports.
To illustrate how conditions and views can be used, let's take the example of an episodic tv production. On this project, we would like to see the list of shots from episode 003 which have been submitted at the COMPOSITING step. We do the following operations:
- select episode 003
- select
stepto COMPOSITING - select
statusto Submitted - hit the
Addbutton
The resulting condition has been updated in the middle section and the view button will now display our list:
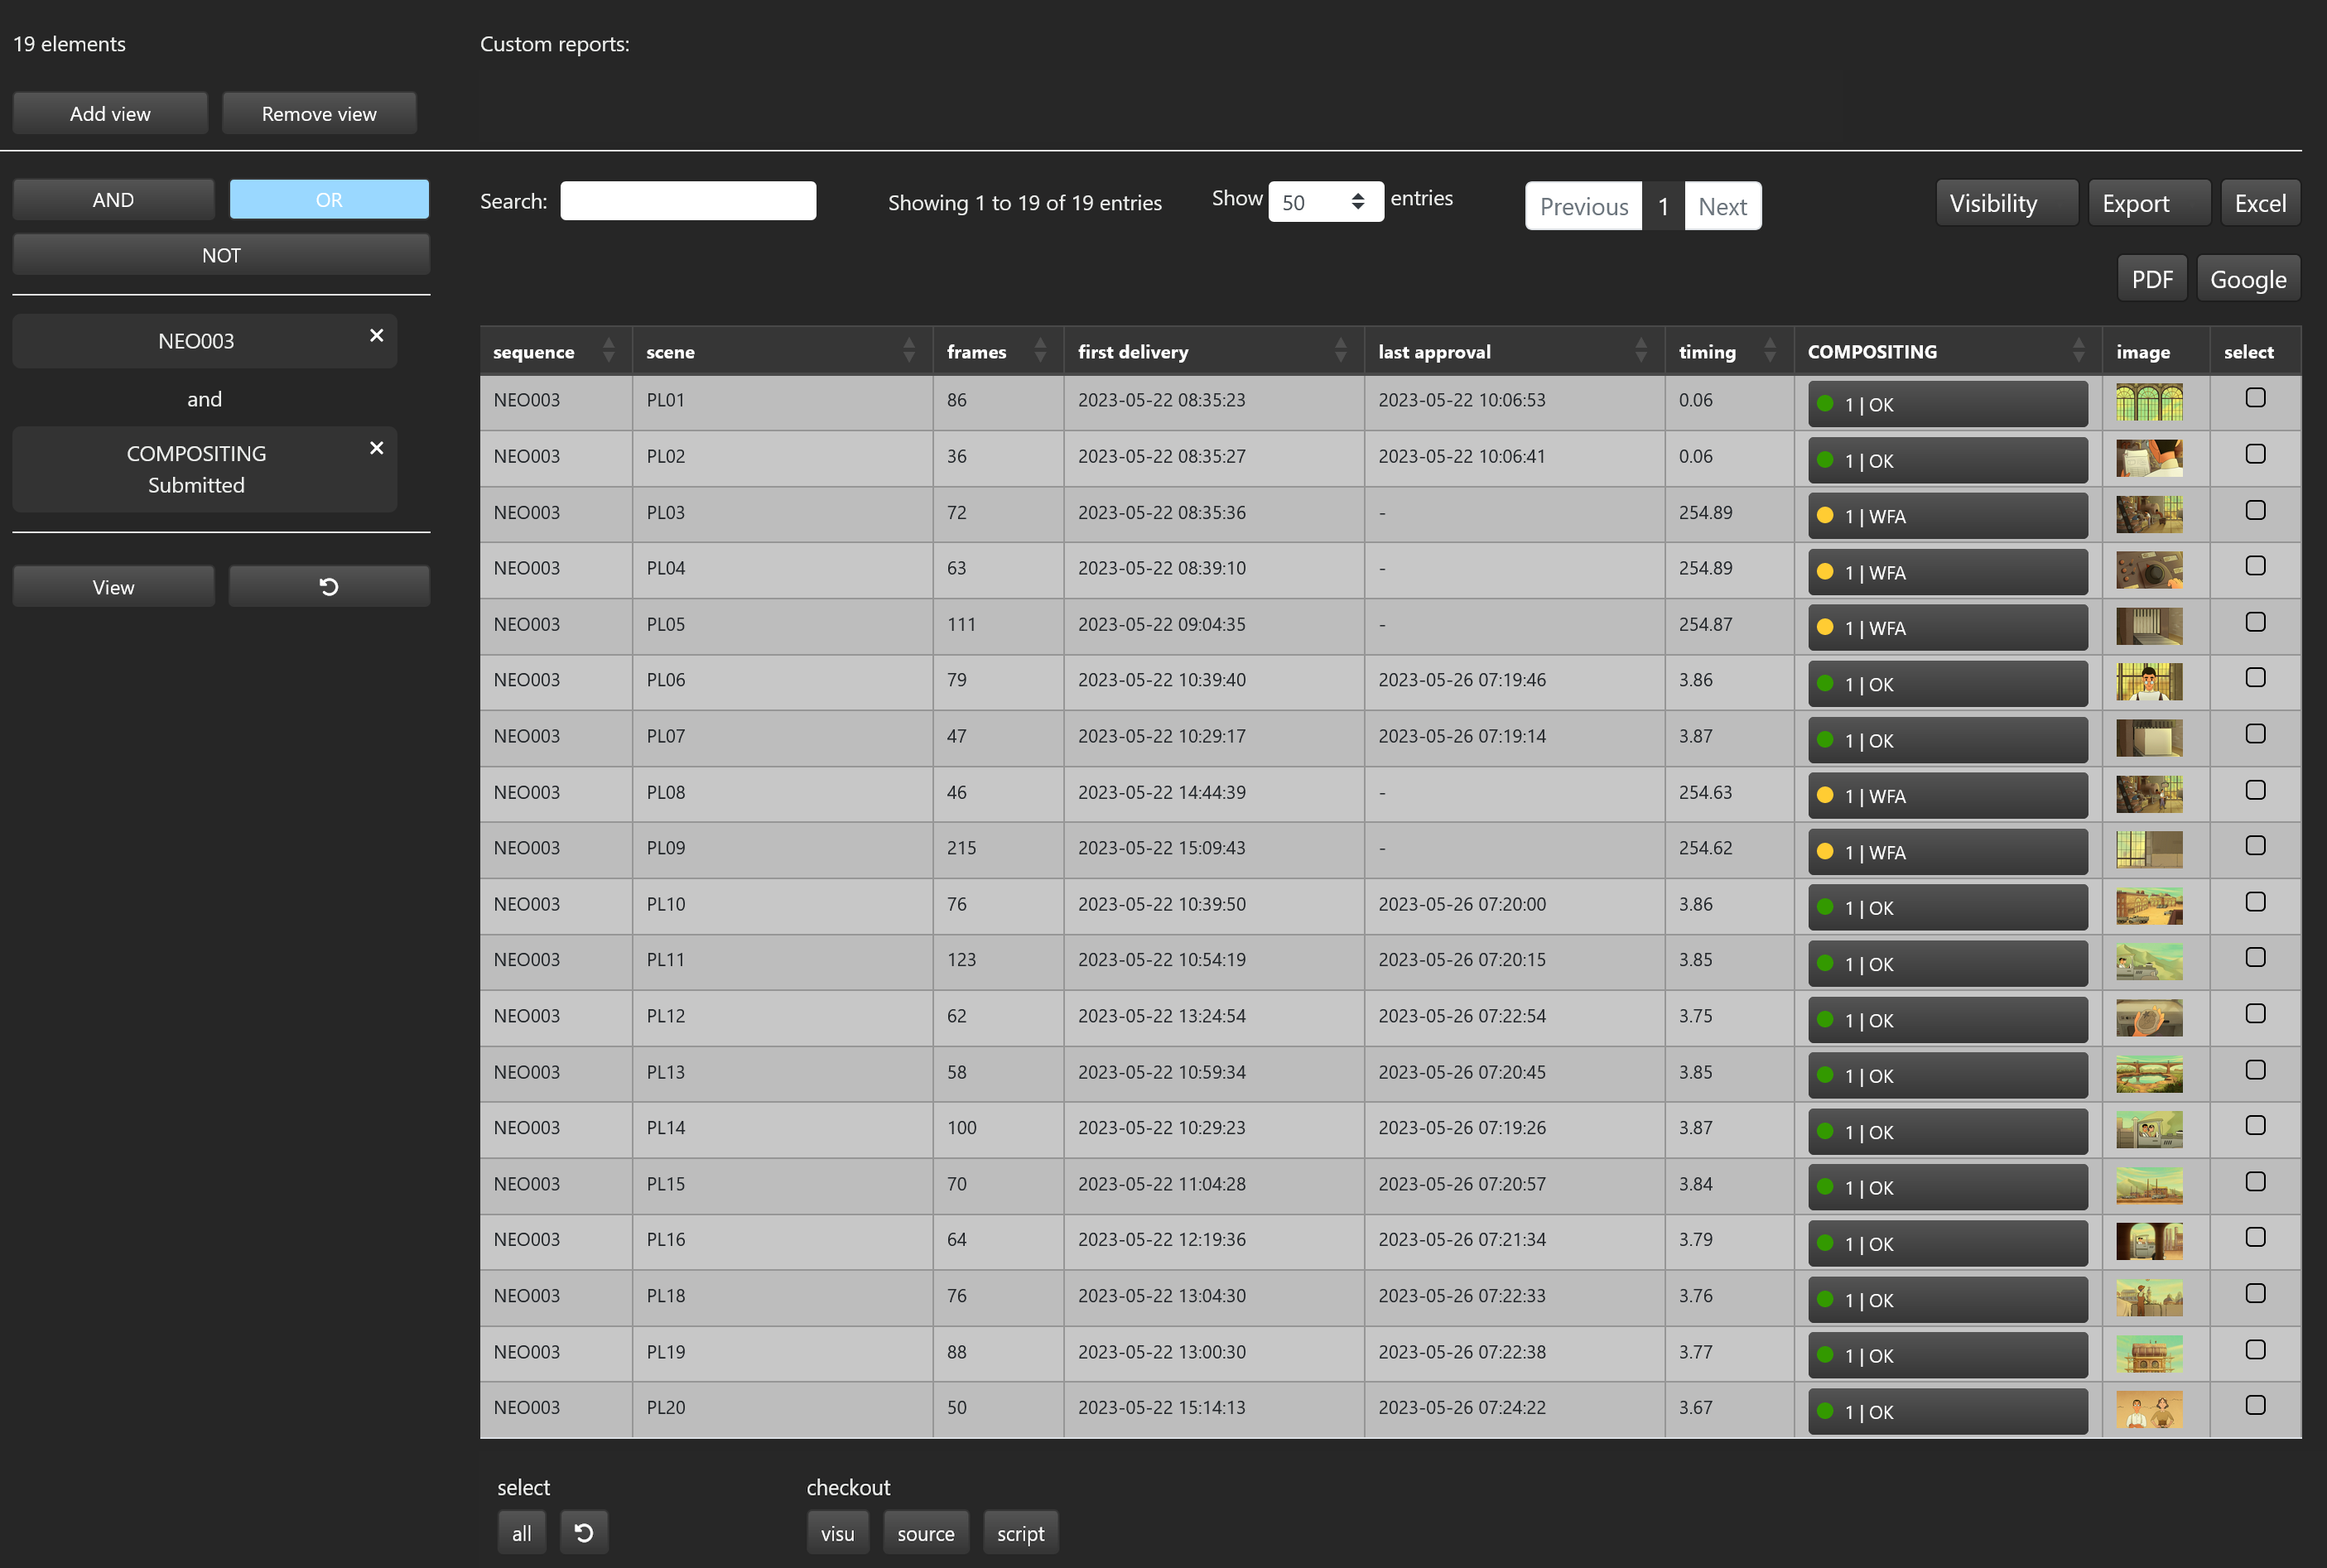
For each element in the list, the following additionnal information is provided:
- the episode name
- the scene name
- the number of frames
- the date at which the first delivery was made
- the date at which the last approval was made (if available)
- the elapsed time in days between the latest approval and the first delivery
- all the steps involved in the resulting condition along with the status of the shot at those steps
- an image of the shot at the most recent step
Elements in that list can be selected and for all selected elements:
- the checkout
visubutton will download the compressed version of the element at the latest step - the checkout
sourcebutton will download the original version of the element at the latest step
The Visibility button allows you to select which additionnal information to display, you also can export
the list in various format through the Excel PDF and Google buttons.
Let us now save this set of conditions under the name "003-COMPOSITING" and suppose we would like to find out how much time was taken between the first delivery of ANIMATIC and the current state of the COMPOSITING step. We perform the following operations:
- select "003-COMPOSITING" from the list of views
- select
stepto ANIMATIC - select
take=1 - hit the
Addbutton - hit the
Viewbutton to display the final result
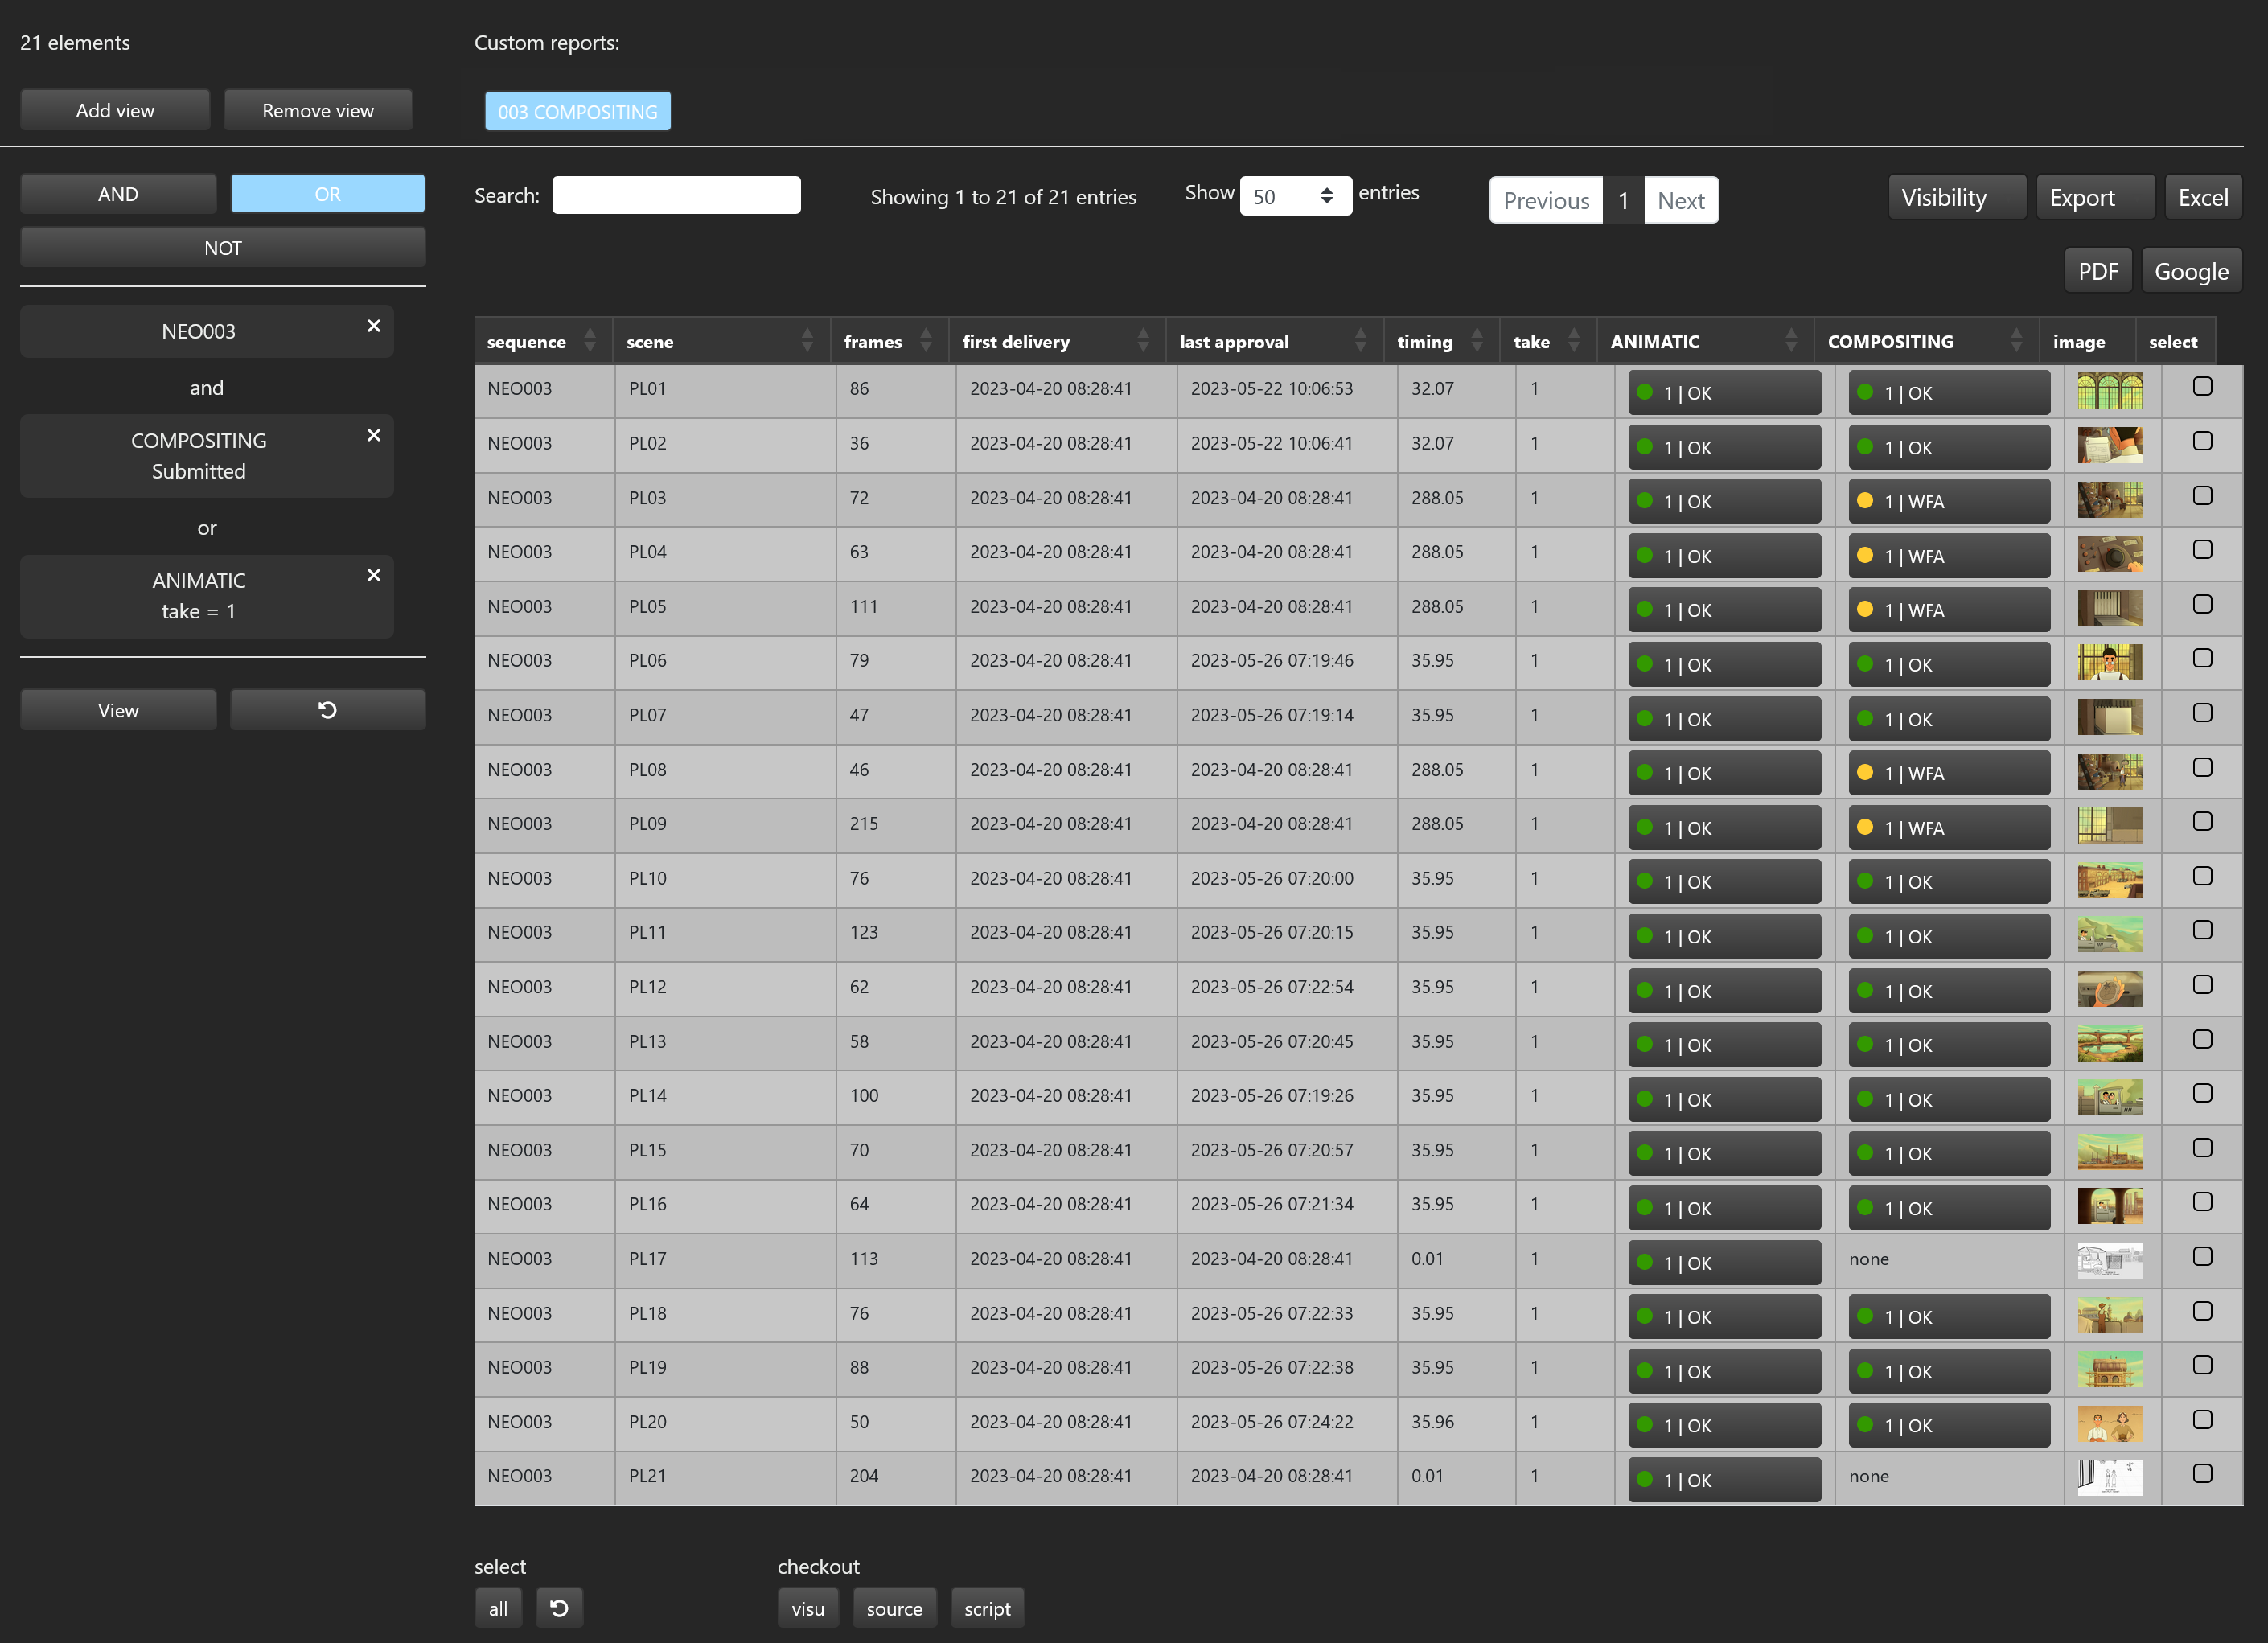
The timing column now gives us the time it took since the first delivery of animatic.
Note that when COMPOSITING has not been approved, the timing is the elapsed time between the first delivery of ANIMATIC and now.